If you’re asking why is primer chipping off the wall after painting, it’s usually due to poor surface preparation or incompatible materials. Common causes include painting over dusty, greasy, or damp walls, using the wrong type of primer for your paint, or applying paint before the primer fully dried. To prevent chipping, always clean and dry the surface, choose a compatible primer, and allow proper drying time before painting.
Primer chips because surfaces were dirty, glossy, damp, or incompatible with the paint.
You don’t want to see flakes days after a fresh coat. If you’re wondering why is primer chipping off the wall after painting, this guide breaks it down in plain terms. I’ve fixed this problem on real jobs, learned from mistakes, and tested repairs that last. Stick with me to find the exact cause, the right fix, and easy ways to prevent it next time.

Best Paint Primer – Expert-Recommended Primers for Every Surface
What primer chipping means and how paint systems bond
Primer is the grip in your paint system. It sticks to the wall and gives paint something to hold. When primer chips after painting, the bond failed. Either the wall, the primer, or the topcoat did not play nice.
Think of it like tape on dusty glass. The tape peels because nothing grabbed well. The same thing happens when surfaces are dirty, glossy, wet, or still curing. If you have asked yourself why is primer chipping off the wall after painting, it starts with bond failure between layers.
:max_bytes(150000):strip_icc()/peeling-paint-wall-GettyImages-1465459070-49b8ac93cd3f4a7982c0e3031bf38f85.jpg)
Common causes of primer chipping after painting
Surface was dirty or chalky
Dust, drywall powder, kitchen grease, smoke film, or hand oils block adhesion. I have seen entire rooms peel because the drywall dust wasn’t wiped after sanding.
Glossy or slick old paint
Semi-gloss and gloss paints are hard and slick. Primer can skid off unless you scuff sand or use a bonding primer. Tile, laminates, and oil-based enamels also need extra prep.
Moisture and humidity
Wet walls or high humidity trap water under the coating. Water expands and pushes primer off. Bathrooms, laundry rooms, and basements are common hot spots.
Wrong primer for the surface
PVA primer is great for new drywall but poor on glossy paint. Stain-blockers seal tannins but do not fix adhesion on slick surfaces. New masonry can burn latex primers due to high pH.
Skipped sanding between repairs
Joint compound is smooth and dusty. If you don’t sand and clean it before priming, the primer may fail in patches.
Incompatibility between coats
Water-based paint over fresh oil-based without sanding or bonding primer can peel. Some paints need a recoat window. If you recoat too early or too late, you can get poor adhesion.
Temperature and dew point
Cold walls cause condensation. If you paint near the dew point, water sits under the primer. The coat dries weak and can chip later.
Old, failing paint underneath
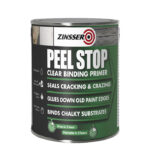
If the base layers are brittle or chalky, new primer pulls them loose. The problem looks like primer failure but starts deeper.
If you keep wondering why is primer chipping off the wall after painting, one or more of these issues is likely the cause.

How to diagnose the real reason
Use these quick checks before you fix anything.
- Tape test. Press painter’s tape on a small area and rip it off. If paint or primer lifts, the bond is weak.
- Water spritz. Mist the wall. If water beads, there may be grease or soap film. If it soaks in too fast, the wall is porous and dusty.
- Scratch test. Lightly scratch with a coin. If layers flake to powder, chalk is the issue.
- Acetone rub. Rub a hidden spot with acetone on a rag. If color transfers, it’s likely latex. If not, it could be oil-based and needs sanding or bonding primer.
- Moisture meter. Check bathrooms, exterior walls, or basements. High readings point to moisture.
- Cross-hatch test. If you can, score a small grid with a razor, press tape, and pull. Heavy loss means poor adhesion across layers.
Keep the focus on why is primer chipping off the wall after painting, and test until the real trigger shows up.
KILZ 3 Reviews – Best Primer for Stains & Odors?

Step-by-step fixes that actually work
Use the path that matches your diagnosis.
- Small chips and sound surrounding paint
- Feather sand the edges smooth.
- Clean with a degreaser or mild TSP substitute. Rinse and dry.
- Spot prime with a bonding primer matched to the surface.
- Repaint the area and blend.
- Dust, chalk, or drywall powder
- Vacuum and wipe with a damp microfiber cloth.
- Use a chalk-binding primer or high-quality PVA on fresh drywall.
- Let it dry fully, then paint.
- Glossy or slick surfaces
- Scuff sand to dull the sheen.
- Clean off dust and residue.
- Apply a dedicated bonding primer.
- Recoat with quality paint after proper dry time.
- Moisture problems
- Find and fix leaks or condensation sources.
- Improve airflow and use a dehumidifier if needed.
- Let walls dry to acceptable levels.
- Use a moisture-tolerant primer, then repaint.
- Oil-to-latex transitions
- Sand to dull.
- Clean well.
- Prime with a strong bonding primer rated for oil-to-latex bridges.
- Paint with acrylic latex.
- New masonry or concrete
- Wait the manufacturer’s cure time.
- Test pH if possible.
- Use a masonry sealer or alkaline-resistant primer.
- Paint after full dry.
- Large failing areas
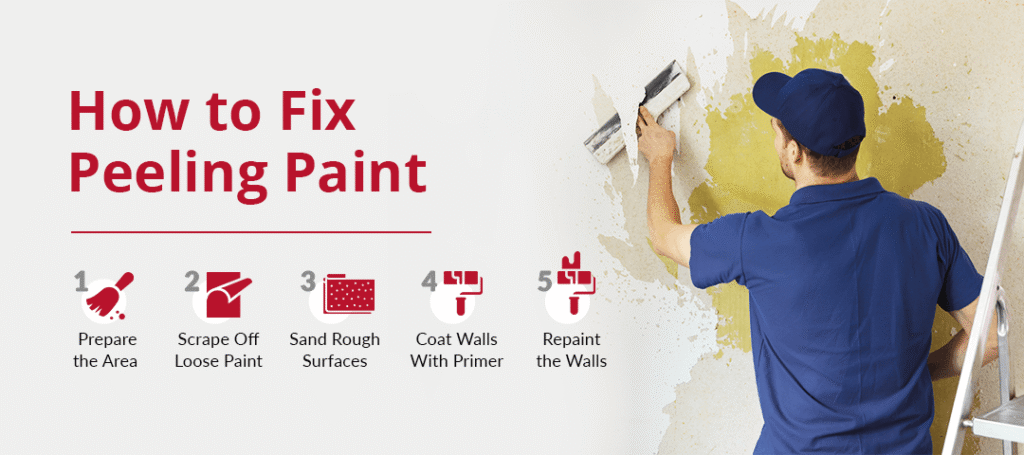
- Scrape all loose material.
- Sand to a smooth, feathered surface.
- Clean thoroughly.
- Prime entire wall if needed for uniform adhesion and sheen.
- Paint with two thin coats.
When I first learned this trade, I rushed dry times in a humid bathroom. The primer looked fine at first, then chipped around the shower in a week. The fix was simple but strict: dry the room, sand, bonding prime, and wait longer between coats. If you still ask why is primer chipping off the wall after painting, the answer is often prep and patience.
Prevention checklist for your next project
- Clean before you sand, and clean again after you sand.
- Dull glossy paint with a light scuff.
- Match primer to the surface. Bonding for slick, PVA for new drywall, masonry sealer for concrete.
- Watch the weather. Stay within the label’s temperature and humidity range.
- Respect dry times and recoat windows on the can.
- Use thin, even coats. Thick coats trap solvents and moisture.
- Vent bathrooms and kitchens. Control humidity while paint cures.
- Buy quality tools. A good roller cover and brush lay paint better.
- Test a small area first on tricky surfaces.
Follow this list, and you will not need to ask why is primer chipping off the wall after painting again.

Smart product choices and specs that improve adhesion
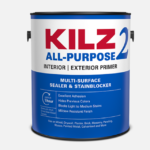
- Use bonding primers on glossy trim, old oil paint, vinyl, tile, and laminates. Look for adhesion specs and multi-surface claims in the technical data sheet.
- Choose PVA drywall primer only for bare drywall. Switch to a higher-adhesion primer on repaints.
- For stained or smoke-damaged walls, use a stain-blocking primer before color coats.
- In bathrooms and laundry rooms, pick paint with mildew-resistant additives and follow cure times.
- Follow label guidance for temperature, humidity, and recoat windows. Many TDS sheets assume about 77°F and 50% RH for best results.
I keep a small kit on jobs: degreaser, microfiber cloths, a sanding sponge, a bonding primer, and a moisture meter. That kit has saved more walls than any fancy brush. It also answers the big worry of why is primer chipping off the wall after painting by making prep and product choice a habit.

Safety, timing, and environment factors you should respect
- Lead paint risk. In homes built before 1978, use lead-safe practices. Avoid dry sanding without proper containment and PPE.
- Ventilation. Keep air moving during and after painting. It speeds cure and reduces odor.
- Off-gassing and cure time. Paint can feel dry but still be weak for days. Be gentle on fresh walls.
- Seasonal timing. In damp seasons, allow more time to dry and cure.
These points may feel small, but they drive results. They also reduce the chance you will ask why is primer chipping off the wall after painting a second time.

Frequently Asked Questions of Why is primer chipping off the wall after painting
Can I paint over chipped primer without sanding?
You can’t. Sand to feather the edges, clean the area, spot prime, then repaint. Skipping sanding will make the chip line telegraph through and fail again.
How long should primer dry before painting?
Most primers need at least one to four hours. Humidity, temperature, and product type can push that longer. Always follow the label.
Do I need a bonding primer on every wall?
No. Use bonding primer on slick, glossy, or hard-to-paint surfaces. For bare drywall, a PVA primer works well.
Why is my bathroom the worst for peeling?
Bathrooms trap steam. High humidity and poor ventilation block cure and weaken adhesion. Improve airflow and use the right primer and paint.
Will a second coat of paint stop chipping?
No. More paint can make it worse if adhesion is weak. Fix the cause, then apply thin, even coats.
How do I know if old paint is oil-based?
Rub a hidden spot with acetone on a rag. If color does not transfer, it may be oil-based. Sand and use a bonding primer before latex.
Is primer always required?
Not always, but it is smart on bare surfaces, stains, repairs, slick finishes, and color changes. Primer solves problems before they start.
Conclusion
Primer chips when prep, product choice, or conditions fall short. Clean well, sand for bite, pick the right primer, and watch humidity and dry times. Small steps prevent big failures.
Take an hour to test, prep, and prime right, and your paint will last for years. If this helped, subscribe for more practical tips, or drop your question in the comments so we can solve it together.