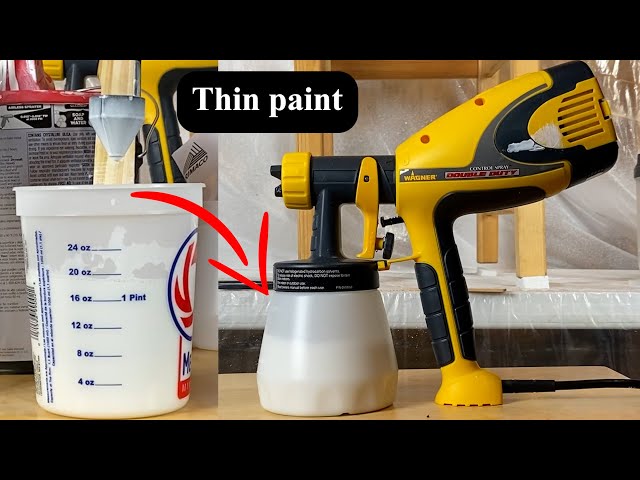
Thinning Paint For Spray Gun
The right paint consistency is essential when using a spray gun. If your paint is too thick, the spray gun will clog, sputter, or spray unevenly. If it’s too thin, you get drips and poor coverage. Thinning paint for spray gun use is all about finding the perfect balance. Let’s dive into how to do it right, why it matters, and what you need to know to get flawless finishes every time.
How To Thin Paint For A Spray Gun
To thin paint for a spray gun, you need to mix the paint with the proper thinner or solvent, based on the type of paint and the spray gun you’re using. Here’s a practical step-by-step approach:
- Read the Paint Can: Most paint manufacturers give thinning instructions. Always start here. Some will even recommend specific thinner brands or mention if thinning is not needed for certain applications.
- Choose the Right Thinner: Use water for latex or acrylic (water-based) paints. Use mineral spirits or turpentine for oil-based paints. For lacquer, use lacquer thinner. Using the wrong thinner can ruin the paint or cause clumping, so double-check before mixing.
- Test the Viscosity: Use a viscosity cup or a simple “drip test” with a stick. This helps you avoid guesswork and keeps your mix consistent.
- Mix Gradually: Start with a small amount of thinner (about 10%) and stir well. Add more only if needed. Adding too much at once can quickly lead to over-thinning, so it’s safer to go slowly.
- Strain the Paint: Run the thinned paint through a mesh filter to remove lumps. Even new paint can develop clumps, especially if the can sat unused for a while.
- Test Spray: Try spraying on cardboard or scrap material. Adjust the thinning as needed. Watch for evenness, coverage, and any signs of splattering or running.
Example
If you have 1 liter of acrylic paint, add about 100 ml of water (10%), mix, and test. If it sprays too thick, add a bit more water, but never exceed 20% without checking the manufacturer’s recommendations. For high-gloss finishes or paint with special additives (like mildew resistance), always start with less thinner, as these paints are often more sensitive to dilution.
Extra tip: Sometimes, leftover paint at the bottom of the can is thicker than paint at the top. Mix thoroughly before thinning, or you may end up with inconsistent results.
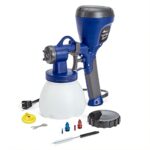
7 Best Wagner Paint Sprayer Tested For Every Project & Budget
Why Thin Paint For Spray Guns?
Thinning paint ensures it flows smoothly through the spray gun. If the paint is too thick, it causes:
- Clogs in the nozzle
- Uneven spray patterns
- Poor atomization (the paint doesn’t break into fine mist)
- Surface texture issues (orange peel effect, runs)
Thin paint helps achieve a smooth, even finish. It also reduces wasted paint and saves time on cleaning and maintenance. When you thin paint correctly, you spend less time fighting with your tools and more time getting work done.
Another advantage: thinned paint dries more evenly and tends to bond better with the surface. This is important for both appearance and durability, especially on surfaces that will be touched often or exposed to weather.
Often overlooked: Proper thinning helps you avoid “flashing,” where some areas dry shinier or duller than others. This common problem is often the result of uneven paint thickness.
What Happens If You Don’t Thin Paint?
If you skip thinning, you’re likely to face:
- Clogged spray gun tips
- Splatters or blobs on your surface
- Wasted paint due to overspray or poor coverage
- Extra sanding and rework
Also, thick paint can stress the spray gun’s motor and shorten its life. For professional results, never skip the thinning step.
You might also notice your finished surface feels rough or “sandy” because the paint never atomized properly. This can ruin doors, cabinets, or car panels where smoothness is critical.
Beginner mistake: Trying to force thick paint through by increasing air pressure only makes things worse—leading to more overspray and mess.
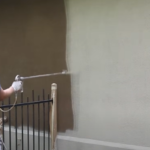
5 Best Wagner Airless Paint Sprayer: Expert Tested & Reviewed
Different Types Of Paint And How To Thin Them
Not all paints are the same. Here’s how to thin the most common types for spray gun use:
| Paint Type | Recommended Thinner | Usual Thin Ratio |
|---|---|---|
| Latex/Acrylic | Water | 10-20% water |
| Oil-based/Enamel | Mineral Spirits | 5-15% thinner |
| Lacquer | Lacquer Thinner | 10-20% thinner |
| Automotive Paint | Specialized Reducer | As specified by manufacturer |
Insider tip: Always buy a small extra can of the correct thinner. Even experienced painters sometimes underestimate how much they’ll need.
Some specialty paints, like chalk paint or elastomeric coatings, have unique thinning needs. Always check the label or contact the manufacturer if you’re unsure. If you’re spraying stain or varnish, thinning is usually minimal—but even a little makes a big difference in flow and finish.
How To Check Paint Thickness (viscosity)
Knowing when paint is the right thickness is part science, part art. Here are two reliable methods:
1. Viscosity Cup
A viscosity cup is a small metal or plastic cup with a hole. You fill it with paint, then time how long it takes to empty. Most spray guns work best when the paint flows through in 20 to 30 seconds.
There are different types of cups (like Ford #4 or Zahn). Each has its own flow time range, so read your spray gun’s manual if you want to get precise. For DIY work, a simple cup from the paint store works fine.
2. Stick Drip Test
Dip a stir stick into the paint. Lift it out and watch the paint flow off:
- If the paint runs in a steady stream, it’s too thin.
- If it falls in thick globs, it’s too thick.
- If it flows in a smooth, steady ribbon, it’s just right.
For beginners, repeat the stick test a few times as you mix. Paint can change consistency quickly as you add thinner.
Data Example: Viscosity Cup
| Paint Type | Ideal Flow Time (Seconds) | Spray Gun Type |
|---|---|---|
| Latex | 25-30 | Airless, HVLP |
| Oil-based | 20-25 | HVLP, Conventional |
| Lacquer | 15-20 | HVLP, Conventional |
Pro insight: Temperature affects viscosity. Warmer paint flows easier. If you’re working in a cold garage, you may need less thinner. On hot days, your paint may thin too quickly—so watch for drips and adjust as needed.
Thinning Paint For Different Spray Guns
Spray guns are not all the same. The type you use affects how much you need to thin your paint.
Airless Spray Guns
- Designed for thicker paints
- Usually need little or no thinning (especially with strong commercial machines)
- For DIY models, thin latex paint by 5-10%
Airless sprayers push paint at high pressure, so they can handle denser paint. However, if your model is small or the nozzle is narrow, some thinning is still needed.
Hvlp (high Volume Low Pressure) Spray Guns
- Require thinner paint for even spraying
- Thin latex by 10-20%, oil-based by 5-10%
HVLP guns give you more control and less overspray, but they struggle with thick paint. Thinning is critical for these models.
Conventional Spray Guns
- Need well-thinned paint for a fine finish
- Thin latex by 15-20%, oil-based by 10-15%
These guns use compressed air to atomize paint and need a fine mist. If paint is too thick, you’ll see lines or dry spots.
Example Table: Spray Gun And Thinning
| Spray Gun Type | Paint Type | Starting Thin Ratio |
|---|---|---|
| Airless | Latex | 5-10% |
| HVLP | Latex | 10-20% |
| Conventional | Oil-based | 10-15% |
Tip beginners miss: If you switch spray gun types in the middle of a job, always retest your paint’s thickness. Even switching nozzle sizes within the same gun can affect how much thinning you need.
Step-by-step: Thinning Paint For Spray Gun Use
Let’s walk through the process with expert tips:
1. Stir The Paint Well
Paint can separate in the can. Stir until the color and texture are uniform. Use a paint paddle or mechanical mixer for best results.
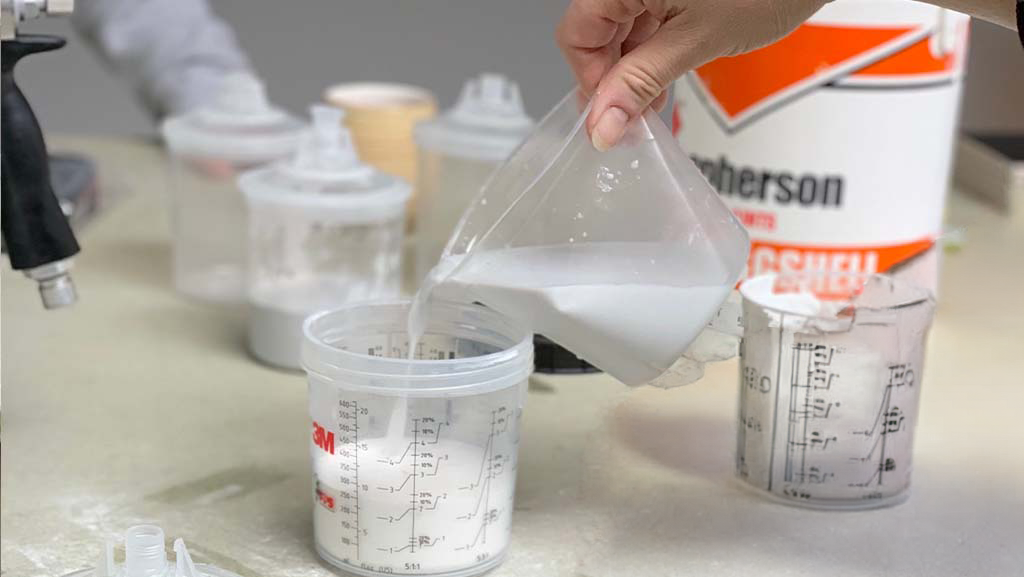
2. Pour Paint Into A Mixing Container
Never thin paint in the original can—you’ll contaminate the whole batch if you make a mistake. A clean plastic bucket works well.
3. Add Thinner Slowly
Start with a small percentage (5-10%). Mix thoroughly. If you add too much at once, it’s hard to correct.
4. Test The Viscosity
Use the viscosity cup or stick method. Check in different spots in the bucket to make sure the mix is even.
5. Adjust As Needed
Add more thinner in small amounts until you reach the right flow. Go slow—over-thinning can’t be undone.
6. Strain The Paint
Use a mesh filter to catch lumps or dried paint bits. Paint strainers are cheap and save hours of frustration.
7. Test Spray Pattern
Spray a test panel. Look for even, smooth coverage without runs or dry spots. Test at the same distance and speed you’ll use on the real surface.
8. Fine-tune
If the paint runs, it’s too thin—add a bit more paint. If it spits or clogs, add more thinner.
Real-world Example
Let’s say you have a quart of latex paint and an HVLP gun. Start by adding 3 oz. (about 90 ml) of water. Mix, test, and spray. If it still feels thick, add another ounce. Repeat until the spray is smooth.
Expert insight: Some paints have anti-sag agents. If you thin too much, these can stop working. Always test on scrap before starting your real project. Also, if you’re working on vertical surfaces, slightly less thinner can help avoid drips.
Common Mistakes When Thinning Paint
Many beginners make errors that cost time and money. Watch out for these:
- Thinning Too Much: Over-thinned paint won’t cover well and may drip or run. If you see the paint “running” down the surface or pooling at the bottom, it’s a sign you need to add back some paint.
- Not Mixing Enough: Paint and thinner must be thoroughly combined. Otherwise, you get uneven color or sheen. Scrape the sides and bottom of your mixing container as you stir.
- Ignoring Manufacturer’s Guidelines: Every paint is different. Check the can or data sheet. Some paints have hardeners or other additives that react badly if over-thinned.
- Using the Wrong Thinner: Oil-based and water-based paints use different thinners. Mixing them can ruin your paint. If you’re unsure, ask at the store or look up the paint’s SDS (Safety Data Sheet) online.
- Skipping the Strainer: Even new paint can have lumps that clog your gun. Using a strainer takes seconds and avoids hours of cleaning.
- Not Testing First: Always spray a test panel before starting your main project. This helps you avoid surprises and saves time in the long run.
Pro tip: Write down your mixing ratios and results. When you find the perfect formula, you’ll want to repeat it next time. Label leftover paint containers with mix info so you don’t have to guess later.
Environmental And Safety Considerations
Working with thinners and spray guns means you’re dealing with chemicals. Here’s how to stay safe:
- Ventilation: Always work in a well-ventilated area to avoid breathing fumes. Open windows, use fans, or work outside if possible.
- Gloves and Eye Protection: Thinners can irritate skin and eyes. Goggles and chemical-resistant gloves are a must, especially with solvents.
- Proper Disposal: Never pour leftover thinner or paint down the drain. Check local rules for disposal. Many communities have special recycling days or hazardous waste facilities.
Hidden hazard: Some thinners are highly flammable. Keep them away from open flames, sparks, or heaters. Store thinners in tightly sealed containers and away from children and pets.
For more on paint safety, see this OSHA guide.
Advanced Tips For Professional Results
A few extra steps can take your results from good to great.
- Warm Paint for Easier Thinning: If your garage is cold, warm the paint to room temperature before thinning. This helps it mix better and spray smoother. Avoid heating paint directly; just bring it inside for a few hours.
- Use a Digital Scale: For repeatable results, weigh your paint and thinner instead of guessing with volume. This is especially helpful for large projects or when matching colors across rooms.
- Filter Twice: Professional painters strain paint before and after thinning to catch any particles. This extra step prevents surprise clogs.
- Store Thinned Paint Properly: If you have leftover thinned paint, store it in a sealed container and label it with the thin ratio and date. Thinned paint can separate faster, so stir again before use.
- Adjust for Humidity: High humidity can affect how paint dries. You may need to thin less in very humid conditions to avoid runs.
Often missed: The same paint may need different thinning on a hot, dry day than on a cool, damp one. Keep notes on weather and results for future reference.
Troubleshooting: Fixing Spray Issues
Even experts run into problems. Here’s how to fix common spray issues:
- Spitting or Sputtering: Usually the paint is too thick. Add a bit more thinner and mix well. Check for clogs in the nozzle too.
- Runs and Sags: Paint is too thin or you’re spraying too close. Back off on thinning or hold the gun farther away. Spraying in several light coats instead of one heavy coat helps prevent this.
- Orange Peel Texture: The surface looks bumpy. Try thinning the paint a bit more, or increase air pressure. Sometimes lowering paint flow also helps.
- Dry Spray: Paint dries before hitting the surface. Thin slightly more, or move the gun closer. This is common in hot, dry weather.
Pro troubleshooting tip: Keep a notebook of your settings, ratios, and weather for each job. Patterns will emerge, making future jobs easier. If a problem keeps happening, change only one variable at a time to isolate the cause.
Frequently Asked Questions
How Much Should I Thin Latex Paint For A Spray Gun?
Start with 10% water for latex paint. Mix well and test the spray. If it’s still thick, add more water up to 20% maximum. Always follow the paint manufacturer’s instructions. For trim or cabinets, err on the side of slightly thicker paint for better leveling.
Can I Use Water To Thin Oil-based Paint?
No. Oil-based paint must be thinned with mineral spirits or turpentine. Water and oil do not mix, and using water will ruin the paint. Always clean oil-based tools with solvent, not water.
What Happens If I Over-thin My Paint?
Over-thinned paint will not cover well. You may see drips, runs, and poor color. If this happens, add more paint to the mix until you reach the right consistency. Sometimes, you may need to apply an extra coat for full coverage.
Do All Spray Guns Require The Same Paint Thickness?
No. Airless spray guns can handle thicker paint with less thinning. HVLP and conventional spray guns need thinner paint for proper atomization. Always check your gun’s manual for recommendations. If you change the nozzle size, retest your paint mix.
How Do I Know If My Paint Is The Right Thickness?
Use the viscosity cup or stick test. The paint should flow in a smooth ribbon, not blobs or a thin stream. Test spray on scrap material to check for smooth, even coverage. If in doubt, err on the side of slightly thicker paint and add more thinner only as needed.
Getting the right paint consistency is the key to a perfect spray finish. With the right thinning process, your spray gun will deliver smooth, professional results every time. Take your time, test as you go, and don’t be afraid to fine-tune your mix.
Every project is a chance to learn and improve your skills. Happy painting!