Blistering paint occurs when moisture, heat, or poor surface preparation causes the paint film to lift and form bubbles. Common causes include painting over damp surfaces, high humidity, trapped moisture behind walls, or applying paint to dirty or unprimed surfaces. Excessive heat or direct sunlight during painting can also create blisters by forcing trapped moisture to expand. The solution is to remove blistered paint, fix moisture issues, allow surfaces to dry completely, clean and prime properly, and repaint under suitable temperature and humidity conditions.
What Is Paint Blistering?
Paint blistering is when bubbles or raised spots form under the paint surface. These blisters can pop or peel, damaging the paint. Blistering happens when moisture or air gets trapped beneath paint layers.
Blisters often start small but grow larger if untreated. They weaken paint adhesion and let water damage walls. Early spotting and maintenance stop blisters from spreading. Understanding causes helps prevent blistering in future paint jobs.
Difference Between Blistering, Bubbling, And Peeling
Blistering, bubbling, and peeling are common paint problems. They look alike but happen for different reasons. Understanding the difference between these issues helps fix paint damage properly. Each problem affects paint and surfaces in unique ways. This section explains how to tell them apart and why it matters.
What Is Blistering?
Blistering happens when small bubbles form under the paint surface. These bubbles push the paint layer up. They look like tiny blisters on the wall or wood.
Blistering damages paint but does not remove it from the surface.
What Is Bubbling?
Bubbling is similar to blistering but often involves larger and looser paint bubbles. These bubbles may feel soft and can burst easily.
Bubbling weakens the paint’s grip on the surface.
What Is Peeling?
Peeling is when paint starts to lift and flake off from the surface. It often follows blistering or bubbling if not fixed early.
- Caused by poor adhesion or moisture damage
- Paint separates in sheets or flakes
- Leaves exposed surface underneath
Peeling shows serious paint failure and needs removal before repainting.
Quick Comparison Table
| Problem | Appearance | Cause | Effect on Paint |
|---|---|---|---|
| Blistering | Small, round bubbles under paint | Moisture trapped, heat exposure | Paint lifts but stays mostly intact |
| Bubbling | Larger, loose bubbles on surface | Wet surface, thick paint layers | Paint softens and bubbles burst |
| Peeling | Paint flakes or sheets lifting off | Poor adhesion, moisture damage | Paint separates completely from surface |
Causes Of Blistering Paint
Blistering paint is a common and frustrating problem that affects many painted surfaces. It occurs when bubbles or blisters form under the paint layer, causing it to peel or crack. Understanding the causes of blistering paint is crucial to prevent damage and maintain a smooth, durable finish. Several factors can lead to blister formation, from moisture issues to improper painting techniques. Identifying these causes helps in choosing the right solutions and protecting surfaces for the long term.
Moisture Trapped Beneath Paint
Moisture trapped beneath paint is one of the most frequent causes of blistering. Water can enter the surface through cracks, leaks, or high humidity. When the water tries to escape, it pushes the paint layer up, forming blisters.
Sources of moisture include:
- Leaking roofs or walls
- Condensation inside walls
- High humidity in the environment
- Wet building materials before painting
Once moisture is trapped, it creates pressure under the paint. This pressure breaks the bond between the paint and the surface. The paint then lifts, creating bubbles or blisters that spoil the appearance and weaken the coating.
Signs of moisture-related blistering:
- Soft or spongy paint surface
- Visible bubbles or raised spots
- Paint peeling in patches
Managing moisture is key to preventing blistering. Use moisture barriers, fix leaks, and allow surfaces to dry completely before painting.
Poor Surface Preparation
Poor surface preparation is a major factor in paint blistering. Paint cannot stick well to dirty, oily, or rough surfaces. This weak adhesion causes paint to peel or bubble after drying.
Common surface preparation mistakes:
- Failing to clean dirt, dust, or grease
- Not sanding rough or glossy surfaces
- Skipping primer on bare or porous surfaces
- Painting over old, peeling paint
Proper surface preparation includes:
- Thorough cleaning with soap and water
- Sanding to smooth or roughen the surface
- Applying a suitable primer layer
- Removing any loose or peeling paint
Good preparation ensures paint bonds tightly and lasts longer. Skipping these steps invites blistering and early paint failure.
Using Incompatible Paints
Using incompatible paints can cause blistering by preventing proper bonding between layers. Different paint types may react poorly when applied over one another.
Examples of incompatibility:
- Applying latex paint over oil-based paint without proper priming
- Mixing paints with different chemical bases
- Using low-quality or expired paint products
Incompatible paints create weak layers that trap solvents or moisture. This leads to swelling and blister formation.
| Paint Type | Compatible Over | Not Compatible Over |
|---|---|---|
| Oil-based | Oil-based, properly primed surfaces | Latex paints without primer |
| Latex (Acrylic) | Latex, oil-based with primer | Unprimed oil-based paints |
Tip: Always check paint labels and use recommended primers to ensure compatibility.
Excessive Heat Exposure
Excessive heat during or after painting can cause blistering. High temperatures dry paint too fast or cause trapped solvents to expand under the surface.
Heat-related problems include:
- Painting in direct sunlight
- Applying paint on hot surfaces
- Using heat guns or heaters too close to wet paint
Rapid drying traps moisture or solvents, creating pressure bubbles. The paint loses flexibility and cracks.
Best practices to avoid heat blistering:
- Paint in shaded or cool areas
- Apply paint during mild temperatures
- Allow proper drying time without artificial heat
Application On Damp Surfaces
Painting on damp surfaces causes paint to lose adhesion and blister. Moisture on the surface prevents proper bonding and creates a weak layer.
Common dampness sources:
- Recent rain or washing
- High humidity or dew
- Surfaces not fully dried after repairs
Painting over dampness traps water beneath the paint. Over time, this water pushes the paint layer upward, causing blisters and peeling.
How to prevent blistering from dampness:
- Check surface dryness before painting
- Use moisture meters for accurate measurement
- Wait longer drying times after cleaning or rain
Osmotic Blistering Phenomenon
Osmotic blistering occurs when water moves through paint layers due to salt or chemical buildup under the surface. This creates pressure that forms blisters.
This phenomenon is common in marine and coastal environments where salt exposure is high. Salt particles attract moisture, causing osmotic pressure.
Key points about osmotic blistering:
- Salt or contaminants trapped under paint attract water
- Water movement causes swelling and paint separation
- Blisters form despite dry surface conditions
- Common on metal and fiberglass surfaces
Prevent osmotic blistering by:
- Thoroughly cleaning surfaces to remove salts
- Using anti-corrosive primers
- Applying waterproof and vapor-permeable coatings
Identifying Blistering Paint
Blistering paint is a common problem that damages the look and protection of walls. It happens when bubbles or bumps form on the painted surface. These blisters can cause paint to peel or fall off over time. Identifying blistering paint early helps to fix the problem before it worsens. Knowing how to spot these blisters can save money and effort in home repairs. Below are key ways to recognize blistering paint on walls and other surfaces.
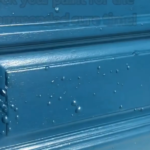
Visual Signs
Blistering paint appears as small or large bubbles on the painted surface. These bubbles may look shiny or dull and stand out from the flat paint around them. The size of blisters can vary from tiny dots to large patches. The paint may also look cracked or peeling near the blisters.
- Bubbles or raised areas: Look for paint that lifts or forms bubbles.
- Cracks around blisters: Paint may crack or split near the bubbles.
- Peeling paint: Blisters often lead to peeling or flaking paint.
- Color changes: Blistered areas may look lighter or darker than the rest.
However, as a general rule, blistering only occurs when the paint layer is in prolonged contact with a liquid.
Below is a simple table to compare normal paint with blistered paint:
| Feature | Normal Paint | Blistered Paint |
|---|---|---|
| Surface | Flat and smooth | Raised bubbles or bumps |
| Color | Even and consistent | May be uneven or faded |
| Texture | Uniform | Cracked or peeling near bubbles |
Touch And Texture Check
Touching the surface can confirm if paint is blistering. Blistered paint feels different from normal paint. It may feel soft, rough, or uneven. Sometimes, the bubbles may pop or peel when pressed gently.
Follow these steps to check paint texture:
- Run your fingers lightly over the surface.
- Feel for raised bumps or rough patches.
- Press gently on suspicious spots to test firmness.
- Check if the paint flakes or peels easily.
Tips for a proper touch check:
- Avoid pressing too hard to prevent damage.
- Use a clean hand or glove to avoid dirt.
- Compare with nearby normal paint for difference.
Blistered paint often feels loose or fragile. It may peel off with slight pressure. Normal paint stays firm and smooth under touch.
Common Areas Affected
Blistering paint does not affect all surfaces equally. Certain areas are more prone to this problem. These areas often have moisture, heat, or poor ventilation. Identifying these spots helps target repairs and prevent further damage.
Common places where paint blisters occur include:
- Exterior walls: Sun and rain exposure cause blisters outside.
- Bathrooms: High humidity and steam promote blistering.
- Kitchen walls: Heat and moisture from cooking lead to issues.
- Windows and doors: Leaks or condensation can cause paint to bubble.
- Basements: Dampness and water seepage increase risk.
Environmental factors play a big role. Heat causes paint to expand. Moisture trapped under paint leads to bubbles. Poor surface preparation before painting also raises the chance of blistering.
Regular checks in these areas help spot blisters early. Fixing leaks and controlling humidity reduce the chance of blistering paint.
Fixing Blistered Paint
Blistered paint ruins the look of walls and surfaces. Fixing blistered paint requires careful steps to ensure the problem does not return. The process starts with removing blisters safely, followed by repairing and smoothing the surface. Repainting with the right techniques and using quality sealants and primers helps protect the surface. Each step matters to get a smooth, lasting finish. Below are detailed methods to fix blistered paint effectively.
Removing Blisters Safely
Removing blisters carefully is the first step. Blisters occur when moisture or heat gets trapped under the paint. Popping them without damaging the surface is important.
- Use a sharp utility knife to cut along the edges of each blister.
- Gently lift the blistered paint with a putty knife or scraper.
- Remove all loose paint pieces to reach the bare surface.
- Clean the exposed area with a damp cloth to remove dust and dirt.
Avoid harsh scraping that could damage the wall or wood underneath. Blisters that are large or deep might need more careful cutting. Wear safety goggles and a mask to protect from dust and old paint particles.
| Tool | Purpose | Safety Tip |
|---|---|---|
| Utility Knife | Cut blister edges | Cut away from body |
| Putty Knife | Lift blistered paint | Use gentle pressure |
| Mask | Protect from dust | Wear at all times |
Repairing And Smoothing Surface
After removing blisters, repair the surface to prepare for repainting. The surface must be smooth and even to avoid visible flaws.
Follow these steps:
- Fill holes and gaps with a quality filler or spackle.
- Let the filler dry completely according to product instructions.
- Sand the filled areas using medium-grit sandpaper to smooth rough spots.
- Use fine-grit sandpaper for a final smooth finish.
- Clean dust with a damp cloth or vacuum.
Proper surface preparation helps paint stick well and last longer. Uneven surfaces cause peeling and new blisters. Use a sanding block for better control. Avoid skipping cleaning after sanding, as dust blocks paint adhesion.
Repainting Techniques
Repainting is more than just applying paint. Use the right techniques to avoid repeating blister problems.
- Choose high-quality paint suitable for the surface type.
- Apply a thin, even coat rather than thick layers.
- Use a brush for edges and a roller for large areas.
- Allow each coat to dry completely before adding another.
- Paint in good weather conditions to avoid moisture issues.
Paint dries better in warm, dry air. Avoid painting on very hot or humid days. Follow manufacturer instructions for drying times and recoating. Poor painting technique leads to bubbles and blisters later.
| Painting Step | Tip |
|---|---|
| First Coat | Apply thin and even |
| Second Coat | Wait until fully dry |
| Brush vs Roller | Brush edges, roller large areas |
| Weather | Dry and mild temperature |
Using Sealants And Primers
Sealants and primers protect the surface and improve paint adhesion. They stop moisture from causing blisters again.
Steps to use them:
- Apply a primer suitable for your surface (wood, drywall, metal).
- Choose a primer with moisture-blocking properties for humid areas.
- Seal cracks or porous spots with a clear sealant before priming.
- Let primer dry fully before painting.
- Use paint with built-in primer for added protection if available.
Primers and sealants form a barrier that stops water from reaching the paint layer. They increase paint durability and reduce peeling risks. Use a brush or roller to apply evenly. For best results, follow product instructions closely.
Preventing Paint Blisters — Best Practices
Blistering paint can ruin the look of any painted surface. It happens when bubbles or bumps form under the paint layer. These blisters weaken the paint and cause peeling or cracking later. Preventing paint blisters is easier than fixing them. Following the right steps during preparation and painting helps keep surfaces smooth and long-lasting.
Proper Surface Preparation
Clean the surface thoroughly before painting. Dirt, grease, or moisture causes paint to blister. Use a mild detergent and water to wash the area. Let it dry completely.
- Remove old, loose paint by sanding or scraping.
- Fix any cracks or holes with filler.
- Ensure the surface is dry and free from dust.
Use Quality Paint And Primer
Choose paint designed for your surface type and climate. Cheap paint often traps moisture, leading to blisters. A good primer helps paint stick well and blocks moisture.
| Material | Recommended Primer | Best Paint Type |
|---|---|---|
| Wood | Oil-based or shellac primer | Acrylic latex paint |
| Metal | Rust-inhibiting primer | Enamel paint |
| Masonry | Masonry primer | Elastomeric paint |
Control Temperature And Humidity
Paint in dry weather with mild temperatures. High humidity traps moisture under paint. Paint applied in direct sunlight dries too fast, causing blisters.
- Check weather forecast before painting.
- Avoid painting if humidity is above 70%.
- Paint when temperatures are between 50°F and 85°F (10°C-29°C).
Apply Paint In Thin Layers
Apply several thin coats instead of one thick coat. Thin layers dry faster and prevent moisture buildup. Allow each coat to dry fully before adding the next.
- Follow manufacturer drying time on the paint can.
- Use smooth, even strokes to avoid trapping air.
- Do not rush between coats.
Ensure Proper Ventilation
Good airflow helps paint dry evenly and prevents moisture accumulation. Open windows and doors if painting indoors. Use fans to improve air circulation.
function checkVentilation() { if (roomIsClosed()) { openWindows(); turnOnFans(); } }
Long-term Maintenance Tips
Proper long-term maintenance prevents paint blistering and keeps surfaces looking fresh. This section offers key tips to avoid future problems and protect your paint investment. Following simple steps helps maintain paint quality and durability.
Regular Inspections
Regular inspections catch early signs of paint blistering before damage spreads. Check painted surfaces at least twice a year. Focus on areas exposed to sun, moisture, or damage. Use a flashlight to spot small blisters or bubbles under paint.
- Look for raised spots or peeling paint
- Check for cracks or discoloration
- Inspect corners, edges, and around windows
- Note areas with water stains or mold
Keep a maintenance log. Write down inspection dates and findings. This helps track paint condition over time. Early detection saves time and money on repairs. A simple checklist can guide inspections:
| Inspection Item | Signs to Watch | Action Needed |
|---|---|---|
| Surface texture | Bubbles, blisters, peeling | Mark for repair |
| Color changes | Fading, yellowing | Consider repainting |
| Moisture spots | Dark stains, dampness | Check for leaks |
Managing Humidity Levels
High humidity causes moisture buildup under paint, leading to blisters. Control indoor and outdoor humidity to protect painted surfaces. Use dehumidifiers in damp areas like basements and bathrooms. Ensure good ventilation to reduce moisture.
Keep humidity levels between 30% and 50% for best paint performance. Use these tips:
- Open windows on dry days to improve air flow
- Fix leaks in pipes, roofs, and walls promptly
- Use exhaust fans in kitchens and bathrooms
- Maintain gutters to avoid water pooling near walls
Outdoor humidity varies by climate. In wet regions, paint during dry seasons. Use moisture-resistant paint designed for humid environments. Proper humidity control reduces blister risk and extends paint life.
Protective Coatings
Protective coatings add a strong barrier against moisture and UV rays. These coatings reduce paint blistering and fading. Choose high-quality primers and topcoats for your surfaces. Some coatings resist water, mold, and mildew.
Types of protective coatings include:
- Sealants: Block moisture from penetrating paint layers.
- UV-resistant paints: Prevent sun damage and color loss.
- Waterproof coatings: Ideal for exterior walls and wood.
- Mildew-resistant paints: Stop fungal growth in humid areas.
Apply coatings following manufacturer instructions. Proper surface prep is key. Clean, dry, and sand surfaces before applying coatings. This ensures strong adhesion and better protection.
Prompt Repairs
Fix paint blisters as soon as noticed to stop further damage. Ignoring blisters lets moisture enter and weaken surfaces. Start repairs by removing loose paint and cleaning the area.
Steps for prompt repairs:
- Scrape off blisters with a putty knife
- Sand rough edges smooth
- Clean surface with mild detergent
- Let area dry completely
- Apply primer to seal surface
- Repaint with matching paint
Regularly repairing small blisters avoids costly repainting later. Track repairs in a log. This helps maintain a strong, smooth finish for years.
Frequently Asked Questions
What Causes Paint To Blister On Walls?
Paint blisters when moisture or heat gets trapped beneath the surface. Poor surface preparation or applying paint on a damp wall often leads to blistering.
How Can I Prevent Paint From Blistering?
Ensure surfaces are dry and clean before painting. Use quality primers and paint, and avoid painting in extreme heat or humidity.
What Is The Best Solution For Blistered Paint?
Remove all blistered paint by scraping or sanding. Repair any moisture issues, then prime and repaint with proper techniques.
Can Humidity Cause Paint Blistering Indoors?
Yes, high indoor humidity traps moisture under paint layers, causing bubbles and blisters. Control humidity with ventilation or dehumidifiers.
Conclusion
Blistering paint often means moisture or heat problems. Fixing these issues stops paint from bubbling again. Clean surfaces well before painting to help paint stick. Use the right paint for your walls and weather. Keep walls dry by fixing leaks and improving ventilation.
Regular checks help catch problems early and save money. With simple care and smart choices, your paint will last longer. Protect your home’s look and value by acting fast.