How Do I Prevent Streaks With a Nap Roller?
To prevent streaks when using a nap roller, start by loading the roller evenly with paint and rolling off excess on a tray. Apply paint in a “W” or crisscross pattern to distribute it uniformly, then finish with smooth, long strokes in one direction without pressing too hard. Keep a wet edge to avoid lap marks and maintain consistent pressure. Using the correct roller nap length for your surface and high-quality paint also helps achieve a streak-free, professional finish.
The Solution: Choosing the Right Roller to Stop Streaks
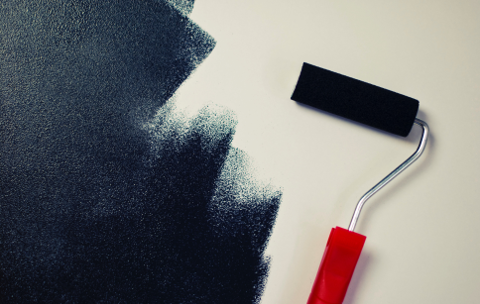
If you’re wondering, “How do I prevent streaks with a nap roller?”, the answer starts with your equipment. Cheap, high-pile rollers shed fibers and hold paint unevenly, leading to those frustrating “track marks.”
Best for Smooth Walls Best for Textured Walls The “No-Shed” Choice Purdy White Dove 3/8″ Nap Wooster Pro/Doo-Z 1/2″ Nap Purdy Marathon High-density foam/fiber mix; leaves a lint-free finish. High-capacity; holds more paint to prevent “dry rolling.” Best for heavy-duty use; stays round for even pressure. The Pro’s Choice: Purdy White Dove 9-inch 3/8-inch Nap
The secret to a streak-free wall is a roller that releases paint consistently. This is the best nap roller for most interior walls because the woven Dralon fabric prevents the “beading” that causes vertical lines.
- Why it works: It carries a heavy paint load and releases it slowly, so you don’t have to press hard.
- Avoid the Mistake: Most DIYers use a nap that is too thick (over 1/2″) for smooth walls, which creates a “stipple” texture that looks like streaks.
You came here asking, How do I prevent streaks with a nap roller?, and you’ll leave with a pro’s checklist. I’ve painted hundreds of rooms and taught crews how to roll glass-smooth walls. This guide breaks down tools, prep, and technique so you can get a clean, even finish every time. Stick with me, and you’ll understand exactly how to prevent streaks with a nap roller in real-world conditions.

What causes streaks and roller marks
Streaks show when paint dries at different speeds on the same wall. That is why you see lap marks, flashing, or dull bands. Uneven pressure and a dry roller also leave lines. The wrong nap length can make texture that fights the finish.
Paint is a film. If you reload late or roll back on half-dry areas, you get ridges. Thick paint in hot rooms can “grab” and show tracks. The fix is simple. Control the film and the timing.
How do I prevent streaks with a nap roller? Start by knowing these causes and planning around them. That mindset sets you up to win.
Choose the right roller nap and cover
The nap is the fabric length. It must match the surface and the paint. Using the wrong nap is the fastest way to get streaks.
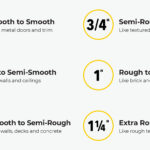
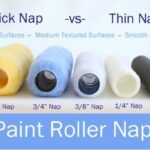
- 1/4 inch nap for very smooth doors, cabinets, and metal. Best with trim paints.
- 3/8 inch nap for most smooth to light-textured walls and ceilings. This is the go-to for flats and eggshells.
- 1/2 inch nap for textured drywall and low-profile orange peel. Good for flats and satin.
- 3/4 inch nap for heavy texture, brick, or rough stucco. Lays down more paint fast.
- Material matters. Microfiber gives a fine finish and holds lots of paint. Woven shed-resistant covers help with semi-gloss and satin.
- Check for lint. Wrap painter’s tape around your hand, dab the new roller, and remove loose fibers.
When people ask, How do I prevent streaks with a nap roller?, I say pick the right cover first. A quality shed-resistant sleeve makes a huge difference.
3/8 or 1/2 Nap Roller – Expert Tips for Paint Coverage & Finish
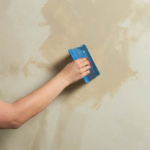
Prep the surface like a pro
Paint shows everything. Dirt, gloss, and dust cause streaks and flashing. Make the wall uniform before you roll.
- Wash greasy spots with a mild degreaser and rinse. Let dry.
- Fill dents and sand smooth. Feather the edges.
- Scuff glossy paint with 220-grit so the new coat grabs.
- Prime patched areas and stains to even out porosity.
- Vacuum dust and wipe with a damp microfiber cloth.
Good light matters. Use a bright work light and scan the wall from an angle. If the wall looks even before paint, your finish will look even after.
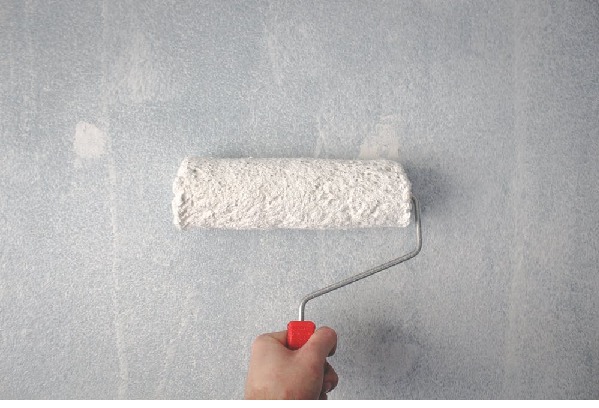
Load the roller the right way
A dry roller drags and makes bands. An overloaded roller drops blobs. Aim for even, full, and not dripping.
- Dampen the cover first. Use water for latex or mineral spirits for oil. Spin out extra.
- Use a grid in a bucket or the deep end of a tray. Roll up and down to load, then up the ridges to even it.
- Keep the roller ends clean. Wipe rims of the cover to avoid edge lines.
- Reload often. If the roller sounds sticky, it is too dry.
You asked, How do I prevent streaks with a nap roller? Start by loading right every time. Even loading equals even sheen.
Thick Vs Thin Roller Nap– Expert Tips for Smooth, Even Paint Coverage

Roll with a system: pattern, pressure, pace
This is where most streaks happen. You need a wet edge and light pressure. Work one section at a time.
- Cut in the edges, then roll that wall within 5 to 10 minutes.
- Make a big W or M to spread paint. Fill in without lifting the roller much.
- Back-roll in one direction for the final passes. Top to bottom is best.
- Overlap each new column of paint by about one-third to one-half.
- Use a light touch. Let the nap do the work. If you see lines, you are pushing too hard.
- Feather off the last pass. Lift the roller slightly at the end of each stroke.
Try this habit. Always finish each section with long, gentle, floor-to-ceiling strokes. It levels the sheen. Wondering again, How do I prevent streaks with a nap roller? Keep your edge wet and your hands light.
Control room conditions and paint flow
Paint dries fast in heat and wind. That creates lap marks. Slow it down for a smoother film.
- Ideal range is about 50 to 85°F and 40 to 70% humidity. Avoid direct sun on walls.
- Close windows if it is hot and windy. Open them if humidity is high.
- Use a paint conditioner made for your paint type if it dries too fast. Follow label rates.
- Work under good light, but not hot spotlights on the wall. Bounce light off the ceiling instead.
Pros plan the wall order. Start away from bright windows and finish toward them. You will see the sheen and catch misses early.
Nap Roller Vs Microfiber- Costly Blunders That Ruin Your Walls
Timing between coats and leveling the finish
Rushing the next coat traps marks. Waiting too long can cause adhesion issues. Follow the can.
- Most latex paints need 2 to 4 hours before recoating. Cooler rooms need more time.
- Lightly sand with 220-grit between coats for a glassy feel. Wipe dust away.
- Keep your final coat smooth. Use the same roller and technique for even sheen.
Ask yourself again, How do I prevent streaks with a nap roller? Respect dry times and keep the final passes gentle and consistent.

Fixing streaks and lap marks after they happen
It is fixable. I have corrected many walls in one more pass.
- For slight bands, scuff sand the shiny ridges. Feather the area with 220-grit.
- Spot prime any burnished or sanded-through patches.
- Re-roll the full section from corner to corner. Maintain a wet edge and overlap more.
- For heavy ridges, shave the line gently with a sharp razor. Sand and touch up, then recoat.
Do not only touch small spots with finish paint. Blend from natural breaks like corners or whole-wall passes. That hides repairs.
Tools checklist and field-tested pro tips
Great tools make clean work. Cheap sleeves shed and stripe.
- Quality shed-resistant roller covers in the right nap sizes
- Sturdy roller frame and an extension pole for control
- 2 to 3 inch angled brush for cutting in
- Paint grid or tray with liners
- Sanding block with 220-grit and a microfiber cloth
- Bright work light and clean drop cloths
- Blue or green painter’s tape and a sharp utility knife
- Conditioner for latex paint if needed
Pro tips I use daily:
- Roll with two sleeves in rotation. While one rests, the other works. It keeps a steady paint flow.
- Start each wall with a fresh, well-loaded roller. It sets the sheen for that wall.
- Keep a damp rag on your belt to wipe roller ends fast.
- If a wall is huge, snap a chalkline to plan sections you can finish while still wet.
When friends ask, How do I prevent streaks with a nap roller?, I hand them this list. Prepared painters get smooth walls.
Safety and cleanup that protect your finish
Clean gear equals clean walls. Old lint and grit cause tracks.
- Ventilate the room. Wear gloves and a mask when sanding.
- For water-based paints, wash sleeves in warm soapy water until clear. Spin them dry.
- Store a loaded roller between coats in a tight plastic bag with the air pressed out. Keep it cool.
- Do not leave the roller sitting on the tray ramp. It flattens the nap and makes lines.
One last time, How do I prevent streaks with a nap roller? Keep tools clean, store them right, and protect the nap. You will thank yourself on the next coat.
Frequently Asked Questions of How do I prevent streaks with a nap roller?
What nap length should I use for smooth drywall?
Use a 3/8 inch nap for most smooth walls. Step down to 1/4 inch for ultra-smooth trim or step up to 1/2 inch for light texture.
How do I keep a wet edge on a big wall?
Work in vertical sections you can finish in a few minutes. Overlap each pass by one-third to one-half so the edge never dries.
Why do I see shiny bands after touch-ups?
That is flashing from uneven porosity or sheen. Spot prime the area and then repaint the whole section, not just the small spot.
Should I add water to my latex paint to avoid streaks?
Do not thin by guesswork. Use a latex conditioner per the label if you need more open time, or adjust room conditions.
How much pressure should I use on the roller?
Very light pressure. Let the roller nap carry the paint, and use gentle, long finishing strokes.
Can I fix streaks without repainting the whole wall?
Sometimes. Lightly sand and re-roll the affected section corner to corner. If the sheen still shows, repaint the entire wall.
Conclusion
Smooth walls come from a simple formula. Pick the right nap, prep well, load evenly, and keep a steady wet edge with light, final passes. Control the room, respect dry times, and fix small issues before they grow.
Put these steps to work on your next wall. Practice on a closet or spare room and build your touch. Ready for more practical guides like this? Subscribe, share your results, or drop a question below so we can help you nail the perfect finish.
Related posts:
 How To Get Emulsion Paint Off Plaster Walls?– Safe Tips, Tools, Chemicals & Techniques
 How To Fix Roller Overlap Marks In Eggshell Paint
 What Is a Roller Nap? – Choosing the Perfect Roller for Walls and Ceilingswhat is a roller nap?
 Thick Vs Thin Roller Nap– Expert Tips for Smooth, Even Paint Coverage