Primer Not Covering Dark Paint, it’s usually because the primer is not designed for high-hide coverage or the dark color is bleeding through. Standard primers may seal surfaces but don’t always block bold or deep shades in one coat. Applying a second coat, using a high-build or stain-blocking primer, or choosing a tinted primer closer to the final paint color can improve coverage. For best results, allow proper drying time between coats before applying your finish paint.
The “Ghosting” Struggle: Why One Coat Isn’t Cutting It
We’ve all been there. It was a rainy Saturday, and I was finally ready to turn my “midnight abyss” bedroom into a “serene cloud” sanctuary. I bought the “one-coat” miracle gallon, feeling like a DIY genius. But as the white paint dried, that moody navy blue started staring back at me. It wasn’t just peaking through; it was haunting the room. Honestly? It felt a little rude.
The Science of Opacity Coverage: Dark Pigments Are Bullies
Here is what I learned the hard way: dark paint is a bully. In the world of opacity coverage, deep colors are packed with heavy pigments that love to soak up light.
When you throw a light color over a dark one, those dark molecules don’t just disappear. They “ghost” through the new layer. To get a clean look, you need a high PVC (Pigment Volume Concentration). This is just a fancy way of saying you need enough solid stuff in the paint—like titanium dioxide—to actually block the old color from showing its face.
The DIY Trap: Primer Isn’t Just “Thin Paint”
I used to think primer was just cheap, watered-down white paint. I was wrong.
- Paint is for color and sheen.
- Primer is for stick and block.
Primer contains specific resins designed to grip the wall and seal the old surface. When I skipped the right primer and went straight for the “all-in-one” bucket, I wasn’t saving time. I was just making a mess. Without that sealing layer, the old dark oils can cause bleed-through, making your fresh white walls look yellow or patchy.
Sensory Check: The Sunday Afternoon Slump
There is a very specific, sinking feeling you get when you see those streaks drying. I remember standing there, roller in hand, smelling that fresh latex scent and realizing my “quick project” just ate my entire Sunday.
The wall looked like a zebra—white, blue, and a weird grey in between. My back ached, the sun was setting, and I realized I’d have to do it all over again. If you see “ghosting” on the first pass, stop. It means your base isn’t strong enough to hide the past.
Choosing the Right Weapon: High-Hide vs. Standard Primers
Last Tuesday, I stood in the paint aisle staring at a wall of white cans. I almost grabbed the cheapest “standard” bucket just to save ten bucks. Don’t do that. Grabbing the wrong tool is a recipe for three extra trips to the store and a very sore back.
What is a High-Hide Primer?
Think of high-hide primer as the heavy-duty armor of the paint world. It has a much higher PVC (Pigment Volume Concentration) than the cheap stuff. This means it is packed with titanium dioxide, the bright white pigment that actually blocks light. While a standard primer is mostly liquid, high-hide is full of “solids” that fill the tiny “pores” of your old dark paint. It creates a thick, opaque shield so the old color can’t peak through.
Adhesion Primer vs. Sealer
I used to get these confused until a pro explained it to me.
- Adhesion Primer: Use this when you need the paint to “stick.” If your old dark wall has a shiny sheen, this primer acts like glue.
- Sealer: Use this when you need to hide a “bruise.” It stops the old wall from soaking up your new, expensive topcoat.
The Power of Blocking Primers
If you are dealing with old, oil-based dark stains, you need a blocking primer. These are the big guns. They prevent bleed-through, which is when the old oils seep into your new white paint and turn it yellow. It’s a lifesaver for making sure your hard work actually stays white.
The Pro Secret: Why You Should Be Using Tinted Primer
I remember the first time a guy at the paint counter told me to turn my white primer grey. I thought he was messing with me! I was trying to cover a deep navy, and adding grey felt backward. But that advice changed my life.
Primer vs Paint– Purpose, Performance, When to Use Both, Avoid Mistake
The Grey Scale Trick
A grey-tinted base bridges the gap between deep charcoal and light cream. It sounds weird, but a stark white primer is actually too bright. It makes the dark paint underneath look like a shadow. A soft grey neutralizes the “bully” colors. This opacity coverage trick means you might only need two topcoats instead of five.
Visualizing the Layers
It all comes down to how light bounces.
- Stark White: Light hits the white, passes through, hits the dark blue, and bounces back as a muddy mess.
- Grey Tint: The grey absorbs the “ghosting” effect. It creates a flat, neutral stage for your final color to shine.
Using a grey base also helps with curing time. Because you aren’t piling on six layers of wet paint to hide the blue, the wall dries faster and harder. It’s a total game-changer for your sanity.
The Solution: High-Hide Primers
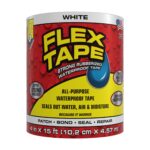
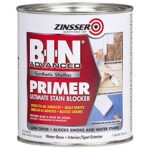
To fix primer not covering dark paint, you need a high-hide professional sealer. These are my top 3 Amazon recommendations for “one-coat” success.
Best for Dark Colors Best for “Bleed-Through” Best Tintable Option Zinsser Bulls Eye 1-2-3 KILZ RESTORATION KILZ 3 PREMIUM High-solids formula designed to obliterate dark tones. Blocks heavy stains and deep pigment “ghosting.” Thicker consistency; can be tinted grey for easier coverage.
Step-by-Step: How to Bury That Dark Color for Good
It’s time to stop venting and start rolling. Let’s get that wall looking like a fresh canvas without losing your mind. Last summer, I tried to cover a deep plum wall in my guest room. I learned that you can’t just rush into the fun part. You have to respect the process.
Prep Like a Pro
Before I even touched a brush, I had to deal with the grime.
- Clean the Gunk: Primer hates grease. I spent an hour wiping off old handprints and dust. If you skip this, your primer will just slide around.
- Sand the Sheen: That old dark paint was a shiny semi-gloss. It felt like glass. I used a fine-grit block to scuff it up. You don’t need to strip it; you just need to give the new layer something to grab onto.
Application Strategy
Once the wall was clean, I grabbed my microfiber roller. This is where most people get shy, but I decided to be bold.
- Loading the Roller: Don’t be stingy. I soaked that nap until it was heavy. You want a “wet edge” at all times. If the roller sounds like Velcro on the wall, it’s too dry.
- The “W” Pattern: I laid the primer down in big “W” shapes. This spreads the product evenly. It stops that annoying shadowing where you see thin spots once it dries. Use synthetic bristles for the corners to keep things smooth.
Dry Times Matter
This is the hardest part: waiting. I felt the urge to start the second coat after twenty minutes. Big mistake. If you rush, you risk peeling or lifting the first layer right off the wall.
Check the curing time on the can. I grabbed a coffee, watched a show, and let it sit. The flash-point of the solvents needs time to do its thing. A little patience ensures the resin bonds perfectly. Once it’s dry to the touch and firm, you are ready to bury that dark color for good.Common Mistakes That Keep the Dark Paint Peeking Through
Sometimes it’s not the product; it’s the process. I remember a humid Sunday afternoon when I tried to rush a job before a big game started. I ended up with a blotchy mess. Here are the traps I fell into so you don’t have to.
- Over-spreading: I used to try to make one gallon do the work of two. It’s a mistake. If you stretch the paint too thin, you lose that vital opacity coverage. You need a thick, even layer to bury those dark tones.
- Ignoring Temperature: That humid day I mentioned? My adhesion primer felt like slime. It wouldn’t set. High heat or moisture messes with the curing time. If it’s too sticky, stop and wait for a dry day.
- Using the Wrong Nap: I once used a thin, smooth roller on a textured wall. It failed to deliver enough material. For dark walls, a microfiber roller with a thicker nap is your best friend. It holds more paint and fills every gap.
When to Call It and Buy More Paint
I’ve learned there is a “Two-Coat Rule.” If you can still see that old, moody color clearly after two full coats of primer, something is wrong. Usually, it means you didn’t use a high-hide primer or you skipped the grey tint trick.
Don’t just keep adding thin layers of white. It’s a waste of time and money. At that point, it is better to go back to the store.
The Final Verdict
In the end, it’s about balancing your budget versus your time. Buying the right resin-rich primer might cost more upfront, but it saves you hours of labor. My advice? Always do a test patch in a small corner first. It gives you a clear view of how the paint bonds before you commit to the whole room.
FAQs Primer Not Covering Dark Paint
Will primer cover dark paint?
Yes, but standard primer often requires multiple coats. To hide dark colors efficiently, use a high-hide primer or a tinted primer (usually grey) to bridge the color gap and ensure full opacity coverage with fewer topcoats.
Do I need to prime over a dark color?
Yes. Priming is essential when transitioning from dark to light to prevent the old pigment from “ghosting” through. It also provides an adhesion primer base that ensures your new, lighter color sticks properly without peeling or requiring five expensive topcoats.
Can you paint over dark paint without primer?
You can, but it is rarely successful. Without a blocking primer, dark colors will bleed through the new layer, resulting in an uneven, muddy finish. You’ll end up spending more on extra gallons of premium paint than you would have on a single can of primer.
What is the hardest paint color to cover up?
Deep reds and vibrant oranges are the most difficult to cover because their pigments are translucent. To bury these “hot” colors, a grey-tinted blocking primer is required to neutralize the underlying vibrancy before applying your final color.
How many coats of primer do I need for black or navy walls?
Typically, two coats of a dedicated high-hide primer are necessary. If you tint the primer to a mid-tone grey, you can often achieve a perfect “blank canvas” in two passes, whereas white primer might require three or four to fully mask the darkness.
Related posts:
 Affordable Ways To Test Paint Colors Without Full Cans– Quick & Easy,Avoid Mistakes
 Best Paint for Kitchen Cabinets Without Sanding – No Prep, No Mess, Long-Lasting Results | Expert Tested
 How To Fix Roller Overlap Marks In Eggshell Paint
 Zinsser BIN Shellac Base Primer Review (2026) – Best Primer for Stains & Odors?