Hairline cracks in a primer coat usually occur due to improper surface preparation, applying the primer too thickly, or using incompatible products. Other causes include painting over a damp or dusty surface, rapid drying in hot or windy conditions, or substrate movement that stresses the primer. These cracks can lead to poor paint adhesion and visible defects in the finish. To fix this, sand the affected area lightly, ensure the surface is clean and dry, apply a compatible primer in thin, even coats, and allow proper drying time before top coating.
The Fix: How to Smooth Out Hairline Cracks
Don’t just paint over the cracks—they will show through your topcoat. You need to lightly sand the area back to a smooth finish. I recommend using a 3M Pro Grade Precision Sanding Sponge (220 Grit).
Why it’s the best tool for the job: Unlike flat sandpaper, a sponge contours to the wall, preventing you from over-sanding the “good” primer while perfectly leveling the cracked ridges. It’s a lifesaver for fixing hairline cracks in your primer coat without starting from scratch.
Hairline cracks in your primer coat come from poor prep, thick coats, or fast drying.
You spotted faint lines after priming and now you’re worried about the paint job. I get it. I’ve primed thousands of walls, cabinets, and exteriors, and I’ve seen every kind of cracking. This guide explains why there are hairline cracks in my primer coat, how to fix them fast, and how to prevent them for good. I’ll share real job-site tips, simple steps, and clear reasons so you can move forward with confidence.
What are hairline cracks and why they matter
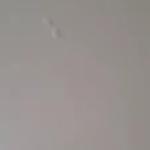
Hairline cracks are tiny, shallow fractures in the primer film. They can look like spiderwebs, faint lines, or subtle checks. While small, they often hint at a bigger mismatch between prep, product, and conditions.
When I see hairline cracks in my primer coat, I treat them as an early warning. If ignored, they can telegraph through the topcoat, cause peeling, or collect moisture and dirt. Addressing them now saves time and money later.
Best Paint Primer – Expert-Recommended Primers for Every Surface

The top causes of hairline cracks in my primer coat
Most cracking tracks back to a few common mistakes. Here’s what I see most often on real projects.
Coats applied too thick
Thick primer traps solvents. The top skins over while the bottom tries to dry. Tension builds and the film checks. This is a frequent cause of hairline cracks in my primer coat.
Recoating too soon or too late
If you recoat too soon, the underlayer is still soft. If you wait past the recoat window, adhesion drops. Both lead to stress and micro-cracking.
Wrong primer for the surface
Using a standard drywall primer on glossy trim or a stain-blocker on bare metal can fail. Mismatched chemistry is a prime driver of hairline cracks in my primer coat.
Contaminated or glossy surfaces
Dust, oils, waxes, furniture polish, and silicone cause poor bonding. So do glossy, un-sanded surfaces. The primer grips weakly and fractures as it cures.
Moisture problems
Wet drywall, damp wood, or high humidity slow cure or push moisture outward. That pressure can cause checking and small cracks.
Heat, cold, and rapid drying
Direct sun, hot rooms, or strong airflow can flash-dry the surface. Cold slows cure and raises viscosity. Either way, stress forms in the film.
Substrate movement
Wood expands and contracts. Drywall seams shift. New plaster shrinks as it cures. Movement shows up as straight or joint-aligned cracks.
Old, over-thinned, or expired primer
Over-thinning weakens the film. Old product can separate or lose resin strength. Weak films crack more easily.
Mixing systems without a bonding bridge
Putting a hot solvent topcoat over a delicate waterborne primer can cause alligatoring or micro-cracks. A bonding primer in between prevents this.
How to diagnose the cause from the crack pattern
Clues are on the surface. The pattern, feel, and timing tell a story.
- Spiderweb or map cracking suggests too-thick coats or fast surface drying.
- Straight lines along seams point to movement or joint issues.
- Cracks only in patched zones mean patch not sealed or overbuilt.
- If you see hairline cracks in my primer coat right after rolling, it was likely too thick or drying too fast.
- If cracks show days later, look at movement, moisture, or recoat timing.
How can I tell if it’s a primer issue or a substrate issue?
If the crack follows seams, wood grain, or edges, the substrate is moving. If it’s even and web-like across open areas, it’s a film build or cure problem with the primer layer.
Do I need to strip everything if I see hairline cracks?
Not always. If they are shallow and don’t telegraph under gentle sanding, you can spot-fix. Deep, widespread cracking may require a full sand-back or strip.

Fixing hairline cracks in my primer coat today
Here is a fast, reliable repair plan I use on jobs.
- Assess depth
Lightly sand a small area with 220–320 grit. If cracks vanish, it’s shallow. If they remain or widen, it’s deeper. - Feather and smooth
Sand the cracked zones until smooth and dull. Wipe with a damp microfiber cloth. Let dry. - Fill if needed
For stubborn cracks, use a lightweight patch or an elastomeric spackle. Apply thin. Let dry. Sand smooth. - Prime smart
Spot-prime with a high-adhesion, stain-blocking or bonding primer matched to your substrate. Follow the label for spread rate and recoat time. - Topcoat after cure
Let the primer cure per instructions. Then apply two thin finish coats.
Tip: When I see hairline cracks in my primer coat on cabinets, I use a high-build bonding primer and spray two light coats rather than one heavy pass.
Materials I trust for this fix:
- 220–320 grit sanding sponge
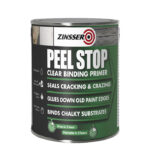
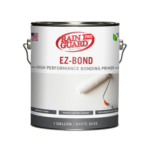
- Bonding or high-build primer
- Lightweight patch or surfacer
- Tack cloth or microfiber
- Quality brush and roller or well-tuned sprayer
Why Is Primer Alligatoring On Old Paint?– Causes & Easy Solution
Preventing hairline cracks in my primer coat forever
A smooth paint job starts before you pop the lid.
Prep checklist:
- Clean with a degreaser or paint-safe cleaner, then rinse.
- Sand glossy areas until dull; wipe away dust.
- Spot repair and let patches dry fully.
- Check moisture. Wood and drywall should be dry to the touch and within normal indoor levels.
Product and application:
- Choose a primer made for your surface: drywall, wood, metal, masonry, or glossy trim.
- Stir well. Do not over-thin.
- Apply within the label’s temperature and humidity ranges.
- Roll thin, even coats. Follow the stated spread rate.
- Respect recoat windows. Set a timer.
Pro habits that help:
- Use the right roller nap for the surface to avoid heavy build.
- Keep a wet edge and avoid back-rolling after the film starts to set.
- Ventilate gently. Avoid strong fans on fresh primer.
- Test a small area first if you are mixing systems.
I always repeat this phrase to crews: thin, even, patient. It is the best way to avoid hairline cracks in my primer coat on any surface, from walls to trim.
Product compatibility and chemistry made simple
Waterborne primers dry by water evaporation and coalescence. Solventborne primers set by solvent release and oxidation. Each has limits.
- Solvent-rich topcoats can soften delicate undercoats. This leads to checking or alligatoring.
- Oil over latex or latex over oil can work, but only with a bonding bridge or proper scuff-sand.
- High solids primers need longer dry and strict film thickness. Heavy coats invite cracks.
Can I put latex over oil primer?
Yes, if the oil primer is fully cured and lightly sanded. A scuff-sand plus dust removal gives latex a tooth to grip.
Why does my sprayed primer crack more than rolled?
Sprayers can lay heavy film fast. If you move too slowly or hold the gun too close, you build too much wet film and it cracks as it skins.
When to worry: cosmetic vs structural
Most hairline cracks are cosmetic. But be alert for red flags.
- Persistent cracks over joints may mean movement. Re-tape or address framing issues.
- Efflorescence or damp patches suggest moisture. Fix the source before repainting.
- New plaster or skim coats need cure time. Priming too soon can cause checking.
If you still see hairline cracks in my primer coat after careful prep, consult a local pro. There may be hidden moisture or substrate stress.

My field notes: real jobs, real fixes
A kitchen cabinet refinish
We sprayed a high-build primer on glossy lacquer doors. The first pass looked great, but an hour later, tiny checks appeared. The coat was too heavy and the shop was hot. We sanded back, cooled the room, and sprayed two thin coats. No more hairline cracks in my primer coat.
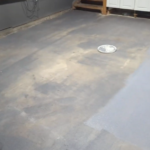
An exterior fascia repair
We primed wood fascia at noon in direct sun. The surface flashed off fast and micro-cracks showed the next day. We stripped the worst areas, shaded the work, and switched to early morning coats. The finish stayed tight and smooth.
These jobs taught me the same lesson: control film build and conditions, and you will not fight hairline cracks in my primer coat again.
Tools, materials, and a quick checklist
Tools and supplies:
- Sanding sponges 220–320 grit
- Bonding or high-build primer
- Lightweight patching compound
- Microfiber cloths and tack cloth
- Quality brushes, rollers, or a tuned sprayer
- Moisture meter if you suspect damp substrates
Quick checklist before you prime:
- Clean, sand, dust, and dry the surface.
- Pick the right primer for the material.
- Check room temperature and humidity.
- Apply a thin, even coat at the right spread rate.
- Follow recoat times. Do not rush.
Follow this, and you will not see hairline cracks in my primer coat on your next job.
Frequently Asked Questions of Why are there hairline cracks in my primer coat?
Are hairline cracks always a sign of bad primer?
Not always. They usually point to application issues like thick coats, fast drying, or poor prep rather than faulty product.
Can I paint over hairline cracks without fixing them?
You can, but they often telegraph through the finish. A quick sand and spot-prime prevents future headaches.
Will a second coat of primer hide the cracks?
Sometimes it hides them but does not fix the cause. Sand smooth, address the issue, then apply a thin, even coat.
How long should I wait before recoating primer?
Follow the label, typically 1–4 hours for waterborne and longer for oil. When in doubt, wait a bit more and do a light scuff-sand.
What temperature is best for priming to avoid cracks?
Most primers prefer 50–85°F with moderate humidity. Avoid direct sun, strong wind, or cold, damp rooms.
Conclusion
Hairline cracks are small, but they speak volumes. They point to film build, timing, or prep issues you can control. Keep coats thin, pick the right primer, and respect cure times. If you do, hairline cracks in my primer coat will be a thing of the past.
Take one space today, fix the cracks with a light sand and spot-prime, and set a timer for recoat. Want more pro-level tips like this? Subscribe, ask a question, or share your project story so we can help you get a flawless finish.