Primer drips and runs on a wall when it is applied too thickly, the surface is too smooth or glossy, or the primer is not properly thinned. Excessive paint on a brush or roller can cause gravity to pull it downward before it dries, while poor surface adhesion prevents the primer from sticking evenly. To avoid drips, apply thin, even coats, use the correct brush or roller, lightly sand glossy surfaces, and allow adequate drying time between coats.
High-density rollers and high-quality brushes hold primer better without “dumping” it all at once.
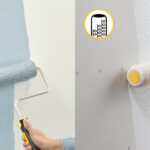
The Fix Recommended Product Key Feature Best for Large Walls Purdy White Dove 9″ Roller Cover High-density nap prevents “splatter” and drips. Best for Trim & Corners Wooster Silver Tip 2″ Angle Brush Soft chemically tipped filaments for a smooth, run-free finish. Best for Prep Gator Micro-Fine Sanding Sponge Scuffs glossy surfaces so primer “grips” instead of sliding.
You came to the right place. I have prepped and primed hundreds of rooms, from tight baths to sun-baked stucco. In this guide, we will answer the big question, Why does primer drip and run on the wall? We will break down real causes, simple fixes, and pro steps to stop it next time. You will get clear tips you can use today.
Best Paint Primer – Expert-Recommended Primers for Every Surface
What “drips,” “runs,” and “sags” really mean
Primer is a liquid film. On a vertical wall, gravity pulls it down. If the coat is too thick or slow to dry, it slides. That slide shows up as drips, runs, or a sag line.
A run is a narrow river of primer that moves down. A sag is a wide droop that forms a wave. Both mean the wet film had low grip or high flow. The root is almost always extra build, poor prep, or bad job site conditions.
Viscosity, surface energy, and dry time matter. If the primer is thin, slick, or cold, it takes longer to set. That gives gravity time to work. This is the core science behind why does primer drip and run on the wall.

Main reasons why does primer drip and run on the wall
Here is what I see most on real jobs:
- Too much product in one pass The wet film is too thick, so it sags.
- Over-thinning The mix is cut past what the label allows.
- Wrong roller nap A thick nap loads too much primer on smooth walls.
- Overloaded brush or roller You dunk, then you do not offload. It dumps on the wall.
- Slow dry due to cold or high humidity The film stays wet and moves.
- Slick or glossy surface No tooth to hold the coat.
- Dirty or chalky wall Dust breaks the bond and the film slides.
- Bad spray setup Tip is too large, or pressure is low. You lay on too much.
- Late re-rolling You pull the half-set film and it drips.
- No back-rolling after a spray The film is uneven and too heavy in spots.
Each of these ties back to the same core idea. If you are asking why does primer drip and run on the wall, the real cause is extra wet film, weak grip, or slow set.
Why Does Primer Have Raised Surface Texture Problems?– Causes & Fixes
Surface prep mistakes that cause runs
Prep is not hype. It is the base.
- Clean first Wash oils, smoke, and dust. Use a degreaser on kitchens.
- Fix porosity Prime raw drywall and patched spots so they absorb even.
- Scuff glossy paint Sand with 220 grit to add tooth. Wipe the dust.
- Deal with chalk If your hand turns white, use a masonry or chalk-binding primer.
- Seal stains Use a stain block primer on nicotine, water marks, or knots.
If the wall is clean and has tooth, the film grabs fast. That alone cuts most cases of why does primer drip and run on the wall.

Product choice and mixing
Not all primers are the same. Some are thick and build fast. Some are thin and bond hard.
- Latex primers Good for drywall and light stains. Fast dry, easy clean.
- Alkyd or oil-based primers Good for old gloss and tannins. Slower dry, strong grip.
- Shellac primers Great stain block and fast set. Strong odor, quick sand.
- High-build primers Fill light texture but can sag if laid on heavy.
- Bonding primers Made for tile, glass, and glossy trim.
Follow the tech sheet. Do not guess. If it says thin up to 10% with water or mineral spirits, do not go past that. Stir well, but do not whip air in. Box your cans for a match. Most cases of why does primer drip and run on the wall start with a bad product match or an over-thin mix.

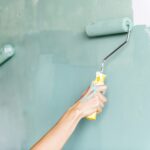
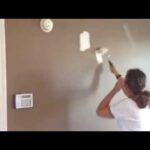
Application technique that stops drips and runs
Small moves matter. Here are the pro habits I teach new crew.
Brush technique
- Offload first Tap the brush on the can edge. Do not dunk to the ferrule.
- Cut, then lay off Smooth, light strokes in one direction.
- Work top to bottom Let extra build land low where you can smooth it.
Roller technique
- Use the right nap 3/8 inch for smooth walls, 1/2 inch for light texture.
- Offload on the tray Do not hit the wall with a dripping roller.
- Make a W, then fill Even out the film, then light layoff passes.
Spray technique
- Pick the right tip Follow the label. Too big floods the wall.
- Keep the gun moving Start off the wall, spray across, end off the wall.
- Back-roll walls Back-roll to level out the film.
Two thin coats beat one thick coat. That is the single best fix when you ask why does primer drip and run on the wall.
How to fix drips and runs when they happen
You can save most runs if you act fast.
While wet
- Feather it Light strokes with a dry brush to pull off excess.
- Lay off Gently even the sheen in one direction.
After it dries
- Scrape the ridge Use a razor at a low angle.
- Sand smooth 220 to 320 grit. Use a sanding block for flats.
- Spot prime Light coat to seal the sanded area.
- Check in raking light Use a side light to see any shadow lines.
Do not pile more primer on a run to “hide” it. It will telegraph. The clean fix is scrape, sand, spot prime, and then coat. This is how I correct why does primer drip and run on the wall without a full repaint.

Job site conditions that cause runs
Weather can beat great technique.
- Temperature Cold rooms slow dry time. Aim for 60–80°F.
- Humidity High humidity keeps water or solvent in the film. Aim under 60%.
- Air flow No breeze slows cure. Use a fan for gentle air, not a blast.
- Dew point If the wall is at or below the dew point, moisture forms and the film slides.
- Sun and heat A hot spot skins the top. When you roll over it, it drags and sags.
I use a cheap thermo-hygrometer on every job. It is a ten dollar tool that answers why does primer drip and run on the wall before it starts.

Tools and setup checklist
Good tools make it hard to fail.
- Brushes 2.5 inch angled nylon/poly for latex. Natural bristle for oil.
- Rollers 3/8 or 1/2 inch shed-resistant covers for primer.
- Trays and liners Clean gear keeps dust out of the film.
- Lights A raking LED helps you spot sags at once.
- Sanding kit 220–320 grit, pad, vac, and tack cloth.
- Additives Use only maker-approved conditioners. Do not overuse.
- Measuring cup and scale If thinning is allowed, measure it right.
Set the room up. Cover floors. Stage lights low to the wall. Mix and strain primer. These small steps are how pros avoid why does primer drip and run on the wall.

Real-world lessons from the field
Story 1: Glossy rental hallway
I once primed a rental hall that had five coats of old semi-gloss. First pass sagged like crazy. We stopped, scuffed the whole space with 220, wiped it with TSP substitute, and switched to a bonding primer. Two thin coats later, zero runs.
Story 2: Damp basement office
A cool, damp basement looked fine at noon. By 3 p.m., I saw slow tears of primer under a window. The hygrometer read 72% RH. We paused, set a dehumidifier and a fan, and came back next day. A light sand and a thin re-coat fixed it. Since then, we always check temp, RH, and dew point before we start. That habit kills most cases of why does primer drip and run on the wall.
Frequently Asked Questions of Why does primer drip and run on the wall?
Why does primer drip and run on the wall even when I use a good brand?
Brand helps, but film build and prep matter more. Too much product or a slick wall will make any primer run.
Can I thin primer to stop runs?
Only if the label allows it, and only within the limit. Over-thinning makes runs worse and weakens adhesion.
Why does primer drip and run on the wall in humid weather?
High humidity slows dry time, so gravity has more time to pull the film. Use a dehumidifier and good air flow.
Do I need to sand between primer coats?
If the surface feels rough or you see a run, yes. A quick sand levels flaws and boosts adhesion.
What roller nap should I use to avoid runs?
Use 3/8 inch for smooth walls and 1/2 inch for light texture. Thicker naps hold more primer and can flood the wall.
Why does primer drip and run on the wall after spraying?
Your tip may be too large, or pressure too low. You also need to back-roll walls to level the film.
How many coats of primer should I apply?
Two light coats are safer than one heavy coat. That reduces sags and gives an even base for paint.
Why does primer drip and run on the wall on patched spots?
Patches absorb at a different rate and can load up. Seal them with a spot coat first, then prime the whole wall.
Will a paint conditioner stop runs?
Only if the maker says it is okay for that primer. Use sparingly; too much slows dry and can cause sags.
Why does primer drip and run on the wall near windows and doors?
Heat and drafts change dry time, and edges tend to get overworked. Apply thin, lay off, and move on.
Conclusion
Runs and sags are simple physics and habits, not bad luck. Keep coats thin, prep for tooth, match the primer to the job, and control the room. Use light, sand fast, and fix flaws before paint.
Take action today. Check your tools, read the label, and plan two thin coats. If this helped, share it, subscribe for more pro tips, or drop your question in the comments.