Primer wrinkles after application when the underlying surface, the primer itself, or environmental conditions cause uneven drying or poor adhesion. Common causes include applying too thick a coat, painting over a wet or glossy surface, using incompatible primer and paint, or working in high heat or humidity. To fix wrinkling, sand the affected area smooth once dry, ensure the surface is clean and dry, apply thinner, even coats, and follow the manufacturer’s recommended drying times and conditions.
How to Prevent Primer Wrinkles
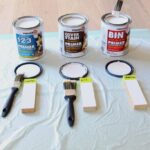
If you’ve already seen wrinkling, you’ll need to sand it back and start over. To ensure it doesn’t happen again, these tools are essential:
Product Why it Prevents Wrinkling Key Feature General Tools Digital Moisture Meter Prevents “Trapped” Moisture. Ensures the surface is dry before you prime. Easy-to-read LCD for wood and drywall. Wooster Silver Tip Brush Ensures Thin, Even Coats. Stops primer from “pooling” and skinning over. Ultra-soft chemically tipped filaments. ThermoPro Digital Hygrometer Monitors Humidity. Tells you if it’s too humid to paint (above 50%). High accuracy and fast refresh rate.
If you keep asking Why is my primer wrinkling after application?, you’re not alone. I’ve seen it on walls, cabinets, and even car panels. In this guide, I’ll break down the science, the simple fixes, and the pro habits that stop it for good. You’ll learn what causes the mess, how to rescue the surface, and how to avoid it next time with clear, tested steps.
Why is my primer wrinkling after application? The core causes
Wrinkling happens when the surface skins over while the layer under it stays soft. The tight skin then puckers as solvents try to escape. Think of it like a warm pie that forms a crust too fast while the filling is still hot and moving below.
Here are the most common triggers I see:
- Heavy coats that trap solvent or water. Thick primer skins at the top and stays gummy under.
- Recoating outside the recoat window. Too soon causes lifting. Too late can cause poor bonding.
- Product mismatch. For example, a hot solvent primer over a soft latex base can attack it and wrinkle.
- Wrong temperature or humidity. Heat can skin the surface fast. Cold or damp air slows cure inside the film.
- Poor surface prep. Glossy, oily, or silicone-contaminated surfaces make primer slide and crease.
- Old or semi-cured layers under the primer. If a base is not cured, new solvent can wake it up.
- Spraying too close or flooding edges. This builds excess film, which moves as it dries.
- Over-thinning with the wrong reducer. The wrong solvent can shock the layer below.
When people ask, Why is my primer wrinkling after application?, the root is almost always too much film, bad timing, or a clash between products. I learned this the hard way on a set of cabinet doors when an alkyd spot-primer wrinkled over a fresh acrylic base because I pushed the schedule.
Best Paint Primer – Expert-Recommended Primers for Every Surface
Diagnose before you fix: quick tests that save time
A few small tests will tell you what went wrong and how deep the damage is.
- Fingernail test. Press a nail into the wrinkle. If it dents or feels rubbery, the lower film is soft.
- Adhesion test. Score a small crosshatch, apply painter’s tape, and pull. If chips lift, bonding failed.
- Solvent rub test. Rub a small spot with isopropyl alcohol on a cloth. If the layer smears, it’s not cured.
- Smell check. A strong solvent odor means trapped solvent and a thicker film than the top can handle.
- Product check. Read the technical data sheet for both coatings. Confirm cure times and recoat windows.
If you’re wondering, Why is my primer wrinkling after application? and all signs point to soft under-layers, plan to remove or sand down before repainting.
Fixing wrinkled primer: step-by-step
You can rescue most jobs with patience and a clear plan.
Step 1: Let it sit
If the film is soft, pause 24–72 hours in a warm, dry room with light airflow. Sometimes wrinkles relax as solvents leave.
Step 2: Level the surface
If the film hardens, dry sand with 180–220 grit to knock down high spots. If the primer stays gooey, strip it with a scraper or a safe remover made for that coating.
Step 3: Clean and decontaminate
Wipe with a proper cleaner. On furniture or auto parts, use a wax-and-grease remover. On walls, use a mild TSP substitute, rinse, and dry. Avoid household polishes with silicone.
Step 4: Scuff for tooth
Sand to a uniform matte. Use 220–320 grit on wood and cabinets. Use 320–400 on metals and previously painted trim.
Step 5: Re-prime the right way
Apply two to three light coats, not one heavy coat. Respect flash times between coats. Aim for a thin, even film.
Step 6: Respect cure and recoat windows
Follow the label. Water-based primers often need 1–4 hours before recoat. Solvent-based can need 30–90 minutes flash, then a wait. If you miss the window, sand before recoating.
I always tell clients who ask, Why is my primer wrinkling after application?, that the fix is part patience, part prep, and part product match.
Prevention checklist to stop wrinkling next time
Use this list before every priming session.
- Keep coats thin. Two light coats beat one heavy coat every time.
- Follow flash and recoat times from the technical sheet.
- Control climate. Ideal is 60–80°F and moderate humidity. Avoid direct sun or very cold rooms.
- Sand glossy surfaces. Aim for a uniform dull look before priming.
- Clean well. Remove oils, dust, and silicone. Rinse and dry.
- Use compatible systems. Stick with one brand system when possible, or confirm cross-compatibility.
- Stir, don’t shake hard. Over-foaming can cause surface issues.
- Use the right reducer. Only thin with what the label allows, and only as directed.
- For tricky surfaces, use specialty primers. Example: shellac for knots or odors, adhesion promoters for plastics, and epoxy for bare metal.
If the thought Why is my primer wrinkling after application? pops up as you work, slow down and check this list before you lay the next coat.
Product compatibility and cure times explained
Dry to touch is not the same as cured. Dry means the surface feels set. Cured means the whole film has finished its chemical process. That can take days.
Why wrinkling happens when timing is off:
- Early recoat can trap solvent below a skin.
- Late recoat without sanding can cause poor adhesion and lifting.
- Hot solvents, like lacquer, can attack soft undercoats.
What to use when:
- Over suspect or stained wood, shellac locks in problems.
- Over bare metal, epoxy primer bonds and resists lifting.
- Over glossy old paint, a bonding primer plus proper sanding prevents wrinkles.
If you still ask, Why is my primer wrinkling after application?, review the product data sheet. It lists the exact recoat window and compatible topcoats.
What Happens If You Paint Without a Primer? – Peeling, Streaks & Mistakes That Cost You Later
Environment: temperature, humidity, and airflow
The room matters as much as the can.
- Keep temperature steady. Avoid hot spots and heaters that blast one area.
- Watch humidity. Water-based primers hate very damp air. Solvent-based can skin too fast in heat.
- Check dew point. Cold walls can sweat. Moisture under primer leads to movement and wrinkles.
- Use gentle airflow. Strong fans can skin the surface while the base stays wet.
Many cases of Why is my primer wrinkling after application? trace back to a hot day, a sunny window, or a cold garage. Small changes in climate make a big difference.
Surface prep mistakes and contamination
Good primer needs a clean, keyed surface.
- Shiny paint needs scuffing. Aim for 220–320 grit on trim and cabinets, 120–150 on raw wood, 320–400 on metals.
- Cleaners matter. Use a proper degreaser, then wipe with water or the right solvent as the label says.
- Beware silicone. Furniture polishes and car dressings can leave films that cause fish eyes and wrinkles.
- Hands leave oils. Wear gloves on final wipe-downs.
- Dust is sneaky. Vacuum, tack with a lint-free cloth, and let the surface settle before coating.
If you are thinking, Why is my primer wrinkling after application?, it may be as simple as residue under the film.
Quick answers: Why is my primer wrinkling after application?
Can heavy coats cause primer to wrinkle?
Yes. Thick coats trap solvent or water and skin on top, which makes the film pucker as it dries.
Will painting in the sun lead to wrinkles?
Often, yes. Direct heat can make the surface cure faster than the layer under it.
Is mixing brands a problem?
It can be. Some solvents attack other binders, so check compatibility and follow each product’s data sheet.
Frequently Asked Questions of Why is my primer wrinkling after application?
How do I know if I should sand or strip wrinkled primer?
Press a nail into it. If it dents deep or feels rubbery, strip it; if it’s firm, sand it flat.
Can I prime over wrinkles and hide them with more coats?
No. More coats lock in the problem and often make it worse. Level the surface first.
What grit should I use before re-priming after wrinkles?
Use 180–220 to knock down texture, then 220–320 to smooth and add tooth for the next coat.
Does humidity affect primer wrinkling?
Yes. High humidity slows curing for water-based products and can cause uneven drying and movement.
Are aerosol primers more likely to wrinkle?
They can if sprayed too close or too heavy. Keep the right distance and use light passes.
Can I use shellac to fix problem areas that keep wrinkling?
Yes. Shellac can lock in contaminants and dry fast, but still apply thin and follow the label.
How long should I wait before sanding a repaired area?
Wait until the film is hard to the touch and odor is faint. For water-based, 2–4 hours; for solvent-based, 4–24 hours, depending on the label.
Conclusion
Wrinkling is a drying and compatibility problem you can predict and prevent. Keep coats thin, follow the recoat window, match products, and control the room climate. If it happens, pause, level the surface, clean well, and re-prime the smart way.
Put this guide next to your paint tray. The next time you wonder, Why is my primer wrinkling after application?, run the checklist and slow down your steps. Want more pro tips like this? Subscribe, share your project details, or drop a question in the comments.
Related posts:
 Zinsser 123 Primer vs BIN -Coverage, Stain Blocking & Performance Compared
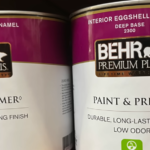 Primer vs Paint– Purpose, Performance, When to Use Both, Avoid Mistake
 Pensulata vs Stucco: 5 Reasons Why Pensulata is Better (And 3 Reasons Why Stucco Still Wins)
 Best Exterior Paint For Stucco: Get Proper Protection & Durability