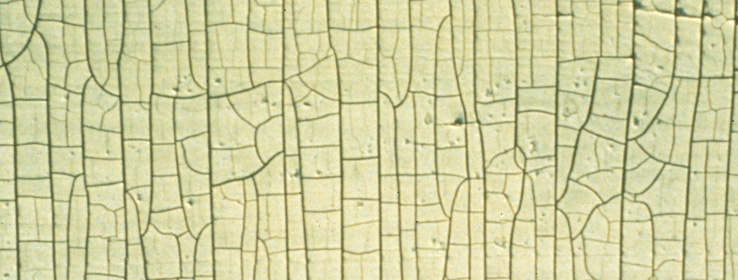
Primer alligatoring on old paint happens when the primer dries unevenly, forming cracks that resemble reptile skin. This usually occurs because the old paint surface is chalky, dirty, oily, or incompatible with the new primer. Applying primer over glossy or poorly prepared surfaces can prevent proper adhesion, causing it to crack as it dries. To fix this, remove loose or peeling paint, clean and sand the surface thoroughly, and use a compatible primer before repainting.
How to Fix Alligatoring (Expert Solution)
You cannot simply paint over alligatoring; the cracks will show through. You must sand it down and use a High-Adhesion Bonding Primer.
Recommended Fix-It Kit
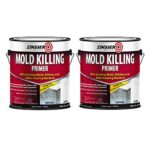
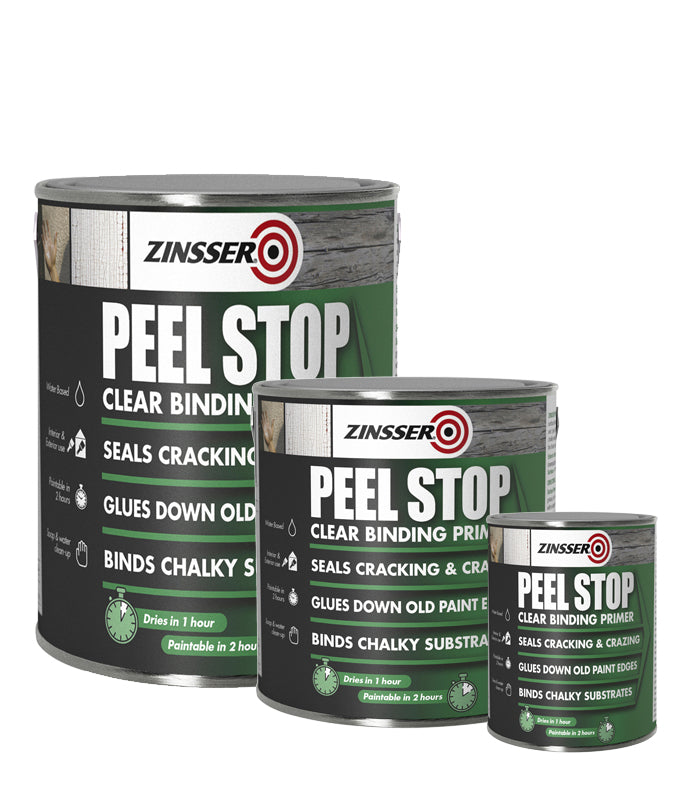
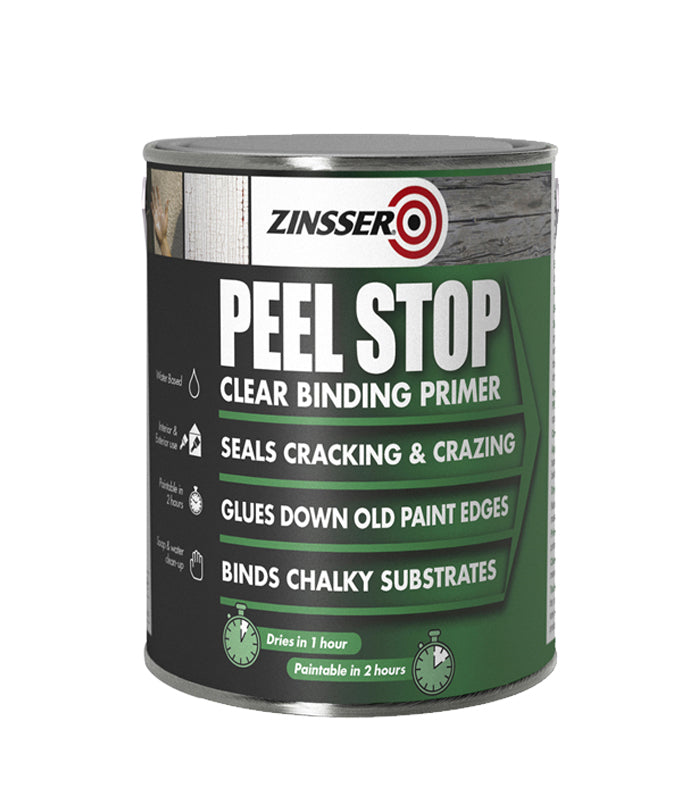
Product Why It Fixes Alligatoring Key Feature 3M Sanding Sponges (80-120 Grit) Essential Prep. Removes the “scales” and creates a “tooth” for the new layer. Flexible for corners; washable and reusable. INSL-X Stix High-Adhesion Primer The Ultimate Solution. Specifically engineered to bond to “impossible” glossy surfaces. Water-borne acrylic; sticks to PVC, tile, and old oil paint. Zinsser Peel Stop Triple Thick Best for Texture. High-build formula fills in minor cracks and seals edges. Prevents future peeling; remains flexible.
If you have ever asked, Why is primer alligatoring on old paint?, you are not alone. I have fixed this failure on jobs from 100-year-old trim to modern drywall. In this guide, I explain what causes it, how to diagnose it, how to fix it, and how to keep it from coming back. We will keep the focus on real steps, clear checks, and proven primers.
Best Paint Primer – Expert-Recommended Primers for Every Surface

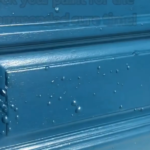
What is primer alligatoring?
Primer alligatoring is a paint failure. The film cracks in a pattern that looks like reptile skin. You see ridges and blocks. It feels hard and brittle.
It is not the same as hairline cracks. It is bigger and deeper. It often shows up fast after priming. It can happen inside or outside.
Some people call it checking or crazing. The cause is often stress in the film. The film cannot move with the old layer below it.

Why is primer alligatoring on old paint?
Why is primer alligatoring on old paint? The simple cause is a bad bond. The new film does not grab the old surface. Then it shrinks as it dries. It breaks in a block pattern.
Why is primer alligatoring on old paint? Here are the most common reasons:
- Incompatible layers. A water-based primer over old glossy oil can fail. The old oil is too slick. The primer has nothing to bite.
- Aged, brittle base coats. Old oil paint gets hard and chalky as it oxidizes. It moves less. New coats move more. That mismatch cracks the film.
- Chalking and dust. If your hand wipes off white dust, that is chalk. Primer over chalk will not stick.
- Gloss and contamination. Wax, polish, smoke, or kitchen grease can sit on old paint. Even a tiny film can block adhesion.
- Heavy coats and solvent trap. A thick coat skins on top. Solvent stays inside. It swells, then shrinks, and the film fractures.
- Missed recoat window. If you wait too long or recoat too soon, intercoat adhesion can fail. Always check the label.
- Moisture vapor. Wet wood or damp walls push vapor out. The pressure lifts the film and causes cracks.
- Temperature and humidity swings. Cold slows cure. Heat speeds skinning. High humidity blocks water from flashing off.
- High pH substrates. Fresh masonry can burn out certain primers. It can lead to weak films and surface stress.
- Movement at joints. Uncaulked gaps or loose boards flex with weather. Rigid primer cannot keep up.
Think of the finish as a chain. Each coat links to the next. If one link is weak, the chain fails. Why is primer alligatoring on old paint? Most times, the prep link broke first.
How to diagnose the root cause
To answer Why is primer alligatoring on old paint?, start with quick field tests. These simple checks can save a full redo.
- Wipe test for chalk. Rub the wall with a dark cloth. A white smear means chalk. You must wash and remove it.
- Water bead check. If water beads, you may have wax or oil. Clean and degloss.
- Tape pull test. Score a small X, press painter’s tape hard, and pull. If primer lifts clean, adhesion is poor.
- Alcohol rub test. Rub a small spot with denatured alcohol. If the old paint softens, it is latex. If not, it is likely oil. Bonding plan changes with that call.
- Moisture reading. Use a moisture meter on wood or a hygrometer in the room. High readings mean you must dry the area before you paint.
- Scratch and scrape. Use a sharp scraper. If layers peel to a slick, shiny base, you are over an old oil enamel. Treat it as such.
How do I tell oil vs latex on old paint?
Do the alcohol rub test. Latex softens with alcohol. Oil will not. You can also look for gloss and yellowing, which often suggest old oil.
Is alligatoring the same as peeling?
No. Peeling lifts in sheets from a weak bond. Alligatoring breaks into blocks from stress and shrink. Both need surface prep fixes.
Should I sand or strip?
If the failure is small, feather sand. If it is wide, you may need to strip or media sand. On pre-1978 paint, follow safe lead rules.

Step-by-step fix for alligatoring primer on old paint
Safety first. Homes built before 1978 can have lead paint. Use PPE, a HEPA vac, and safe work methods. Follow local rules for dust and waste.
Follow this plan:
- Identify the base. Why is primer alligatoring on old paint? Often because the base is glossy oil. Confirm with the alcohol test.
- Remove failed material. Scrape all loose primer and paint. Keep going until you hit sound edges.
- Feather sand. Use 120–150 grit to smooth ridges. Do not leave sharp edges. Wipe dust with a damp cloth or vacuum.
- Degrease and degloss. Wash with a TSP substitute or a paint-safe degreaser. Rinse well. For extra grip, use a liquid deglosser and scuff-sand.
- Fix moisture issues. Seal leaks. Caulk gaps. Let wood reach safe moisture levels before you prime.
- Spot test primers. Prime a small area and let it cure. Do a tape pull. If it passes, proceed.
- Choose the right primer.
- Shellac-based primer for slick oil, knots, and stains. It dries fast and grabs like a glue.
- Oil/alkyd bonding primer for old oil enamels and trim. It builds a tough link.
- Waterborne bonding primer (urethane-acrylic) for low VOC jobs. Use it only after strong prep on glossy oil.
- Apply thin coats. Follow spread rate on the can. Aim for even film build. Do not flood the surface.
- Respect dry and recoat times. Mind temperature and humidity ranges. Use fans and gentle airflow if needed.
- Topcoat with a compatible paint. 100% acrylic latex is flexible for most exteriors. For trim, a waterborne alkyd can give a hard finish with good flex.
Small jobs? I often spot prime with shellac and then switch to acrylic topcoat. Big jobs with old oil? I use an alkyd bonding primer for the first coat. Then I move to acrylic.
Prevention: best practices before you prime
The best cure is smart prep. Before you roll, ask yourself: Why is primer alligatoring on old paint? Let that guide each step.
- Clean first, then sand. Dirt and wax kill adhesion. Wash well, rinse, and dry.
- Break the gloss. Use 120–180 grit or a liquid deglosser. Your primer needs tooth.
- Control the room. Stay in the label range for heat and humidity. Avoid dew and direct sun.
- Watch film build. Do not lay it on thick. Follow the spread rate. Two light coats beat one heavy coat.
- Follow recoat windows. Set a timer. Too soon or too late can hurt the bond.
- Match systems. Oil over oil with bonding primer, or shellac as a bridge. Acrylic over clean, dull, dry surfaces.
- Test first. A small test patch can save the whole job.
Why is primer alligatoring on old paint? Because a weak link slipped in. Build each link with care, and the chain stays strong.
Real-world examples, mistakes, and lessons learned
I once primed 1950s kitchen cabinets. The owner loved spray polish. The waterborne primer crazed in a day. I stripped the failed coat, degreased twice, scuff-sanded, then used shellac primer. The finish held tight for years.
On a south-facing porch, I saw the worst case. Old oil paint, hot sun, and a heavy latex primer coat. It alligatored by evening. We scraped to sound paint, sanded, and used an alkyd bonding primer. Then we topcoated with acrylic. It still looks great.
Lessons I live by:
- Clean until a wet rag stays clean.
- When in doubt, shellac it out on spots and stains.
- Thin coats win coats.
- Tape tests tell the truth.
- Respect the weather and the label.
Why is primer alligatoring on old paint? I learned the answer the hard way. Now you do not have to.

Frequently Asked Questions of Why is primer alligatoring on old paint?
Why is primer alligatoring on old paint after I washed the wall?
You may still have chalk or residue. Rinse better and let it dry. Degloss and test a bonding primer.
Why is primer alligatoring on old paint on exterior siding?
Sun and heat speed skinning, and old oil gets brittle. Use a bonding or shellac primer and apply thin coats in shade.
Can I paint over alligatoring primer?
No. You must remove the failed areas first. Feather sand, clean, and prime again with the right product.
What primer stops alligatoring on old oil paint?
Shellac or an alkyd bonding primer works best. Both grip slick, aged oil and block stains.
Do I need to strip to bare wood?
Not always. Scrape to sound edges and feather sand. Strip only if failure is wide or the base is too brittle.
How long should primer dry before painting to avoid alligatoring?
Follow the label for temp and humidity. Many primers need a few hours, but cool, damp air needs more time.
Will high humidity cause primer to alligator?
It can slow dry and trap water. That leads to stress cracks. Keep humidity in range and use light coats.
Does chalking cause primer alligatoring?
Yes. Chalking blocks adhesion. Wash it off and recheck with a wipe test before you prime.
Conclusion
Alligatoring looks scary, but it follows clear rules. Now you can spot the cause, fix it right, and keep it from coming back. Thin coats, clean surfaces, the right primer, and patient timing win every time.
Want more help beyond Why is primer alligatoring on old paint?? Ask a question, share a photo, or subscribe for step-by-step guides and tool lists. Let’s get your next coat to look great and last long.