The answer is a resounding yes, but with crucial considerations regarding the type of primer, the sprayer model, and proper preparation.
Understanding these nuances is key to achieving optimal results and preventing damage to your equipment.
This comprehensive guide will explore the compatibility of Wagner paint sprayers with primers, detailing the types of primers suitable for spraying, the specific Wagner models best equipped for the job, essential preparation steps, and tips for achieving a flawless finish.
We will also address common issues and provide solutions, ensuring you can confidently tackle your next project with primer and your Wagner sprayer.
Key Takeaways
- Wagner paint sprayers are generally capable of spraying primers, but success depends on the primer’s viscosity, the specific Wagner sprayer model, and proper setup.
- Thicker, high-build primers often require more powerful sprayers, such as HVLP (High Volume Low Pressure) or airless models, with larger tip sizes.
- Thinning the primer is frequently necessary to achieve the correct viscosity for spraying, but the thinning ratio must be carefully determined based on manufacturer recommendations and sprayer capabilities.
- Thorough cleaning of the sprayer before and after use is paramount, especially when switching between different paint types or primers, to prevent clogs and ensure longevity.
- Proper surface preparation, including masking and priming the surface itself, is as critical as the spraying technique for a professional finish.
- Choosing the right nozzle or tip size for the primer’s viscosity is essential for consistent flow and coverage.
4 Best Wagner Paint Sprayer For Walls: Reviews And Guide
Understanding Primer And Its Role In Painting
Primer acts as a foundational layer that prepares a surface for the topcoat. Its primary functions include enhancing adhesion, improving coverage, blocking stains, and providing a uniform surface for paint. Primers are formulated with different binders and pigments depending on their intended use, which directly impacts their viscosity and sprayability.
Some primers are designed to be thick and provide significant build, while others are thinner and focus on adhesion or stain blocking.
The viscosity of a material refers to its resistance to flow. Thick materials have high viscosity, while thin materials have low viscosity. Paint sprayers are designed to atomize liquids into fine droplets, a process that is highly dependent on the liquid’s viscosity. If a primer is too thick for a particular sprayer, it can lead to inconsistent spray patterns, clogs, and even damage to the sprayer’s internal components, such as the pump or motor. Conversely, primers that are too thin might not offer the necessary coverage or adhesion properties.

Can Wagner Paint Sprayers Handle Primers?
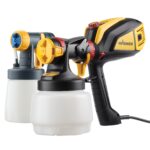
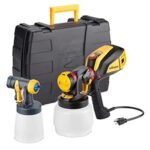
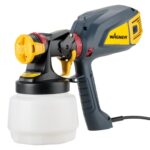
The direct answer is yes, most Wagner paint sprayers can be used with primers, but this capability is contingent upon several factors. Wagner offers a diverse range of sprayers, from handheld units to larger turbine and airless systems, each with varying power and atomization capabilities.
Types Of Primers And Their Sprayability
Primers come in various formulations, and their suitability for spraying depends heavily on their composition and intended purpose.
- Water-Based Primers: These are generally easier to spray and clean up. Latex or acrylic-based primers are common and often require minimal thinning for spray application. They are ideal for general-purpose priming on drywall, wood, and previously painted surfaces.
- Oil-Based Primers: These tend to be thicker and may require more thinning or a more powerful sprayer. They offer excellent adhesion and stain-blocking properties, making them suitable for challenging surfaces like bare wood with tannins, metal, or surfaces with water stains. Special attention must be paid to thinning ratios and sprayer compatibility.
- Shellac-Based Primers: Known for their superior stain-blocking capabilities, especially for knots, watermarks, and smoke damage. Shellac primers are typically thinner than oil-based primers but can still require careful handling to achieve a smooth spray. They also require specific cleaning solvents.
- High-Build Primers: These are designed to fill minor imperfections and create a thicker, smoother surface. Due to their inherent thickness, they often require more robust sprayers, larger tip sizes, and potentially more aggressive thinning.
Wagner Sprayer Models And Primer Compatibility
Wagner’s product line includes several types of sprayers, each with different strengths when it comes to handling thicker materials like primers.
- Handheld Sprayers (e.g., Wagner FLEXiO series): These are popular for DIY projects and are generally good for thinner materials. Some FLEXiO models, particularly those with adjustable settings and larger cups, can handle certain primers, especially if they are water-based and thinned appropriately. However, they may struggle with very thick or high-build primers. The FLEXiO 5000 and FLEXiO 3000 offer more control and power than basic models.
- HVLP (High Volume Low Pressure) Sprayers (e.g., Wagner Control Pro series, some older models): HVLP sprayers are designed to deliver a large volume of air at low pressure, which atomizes paint more effectively and with less overspray than traditional air compressors. These are generally well-suited for primers, especially those with moderate viscosity. The Control Pro 250 R and Control Pro 250 M are examples of HVLP systems that can handle a variety of coatings, including primers. They often allow for adjustable air pressure and material flow, which is beneficial for different primer types.
- Airless Sprayers (e.g., Wagner Pro/ProX series): Airless sprayers use high pressure to atomize paint, making them the most powerful option for thicker materials. These are ideal for heavy-bodied primers, exterior painting, and large-scale projects. Models like the Wagner Pro 119 or Pro 131 are designed for professional use and can easily handle most types of primers without extensive thinning. They feature larger tip sizes that are better suited for viscous materials.
Pro Tip: Always check the manufacturer’s specifications for your specific Wagner sprayer model. It will usually indicate the maximum material viscosity it can handle and the recommended tip sizes for different coatings.
Preparing Your Wagner Sprayer For Primer
Proper preparation is not just about the surface you’re painting; it’s equally crucial for your sprayer to ensure a smooth application and prevent issues.
Best Fence Paint For Wagner Sprayer: Top 5 Picks By Painters
Cleaning And Inspection
Before using primer, ensure your Wagner sprayer is thoroughly cleaned from any previous coatings. Even if you used primer last, residues can dry and cause clogs.
- Disassemble: Follow your sprayer’s manual to carefully take apart the relevant components (e.g., suction tube, paint hose, spray gun, nozzle).
- Clean Components: Wash all parts with the appropriate cleaning solution. For water-based primers, this means warm, soapy water. For oil-based or shellac primers, use mineral spirits or denatured alcohol, respectively.
- Rinse Thoroughly: Ensure no cleaning solvent or residue remains, as this can affect the primer’s performance or clog the sprayer.
- Inspect: Check all seals, O-rings, and internal parts for wear or damage. Replace any worn components to prevent leaks or performance issues.
Choosing The Right Tip Or Nozzle Size
The tip or nozzle size is arguably the most critical factor when spraying thicker materials like primers. The orifice size of the tip determines how much material can pass through and how finely it is atomized.
- General Guideline: For primers, you will typically need a larger tip size than you would for standard latex paint.
- Water-Based Primers: Often require tips in the range of 0.015 to 0.021 inches.
- Oil-Based and High-Build Primers: May need tips from 0.017 to 0.025 inches or even larger for very thick formulations.
Refer to the primer manufacturer’s recommendations and your Wagner sprayer’s manual for specific tip size guidance. For example, a Wagner Control Pro sprayer might recommend a larger tip size for primer compared to its standard paint settings.
Thinning The Primer (when Necessary)
Many primers, especially those not explicitly labeled as “sprayable,” will require thinning to achieve the correct viscosity for your sprayer.
- Consult Manufacturer: Always check the primer’s label or technical data sheet for thinning recommendations. They usually provide a recommended thinning ratio (e.g., 5-10% by volume).
- Thinning Agent: Use the appropriate thinning agent, usually water for latex/acrylic primers, mineral spirits for oil-based primers, or denatured alcohol for shellac primers.
- Gradual Thinning: Add the thinning agent in small increments, stirring thoroughly after each addition. Avoid over-thinning, as this can compromise the primer’s performance (adhesion, coverage, durability).
- Viscosity Test: A simple but effective method is the “flow test.” Pour some thinned primer into a disposable cup and time how long it takes to pour back into the container. A general guideline for many sprayers is that the material should flow freely, taking approximately 10-20 seconds for a quart to drain. However, specific requirements vary greatly by sprayer type and manufacturer. For HVLP sprayers, the viscosity is often measured using a viscosity cup (e.g., #4 Ford cup), with typical sprayable viscosities for latex paints being around 20-30 seconds. Primers might be slightly higher.
Example: If a primer’s technical data sheet recommends thinning by 10% for spraying, and you have a gallon (128 oz) of primer, you would add approximately 12.8 oz of the appropriate thinner. Always start with less and add more as needed.

Surface Preparation For Spraying Primer
A flawless finish with primer, just like with paint, relies heavily on the preparation of the surface being coated.
Cleaning And Repairing The Surface
- Remove Dust and Debris: Ensure the surface is completely free of dust, dirt, grease, and cobwebs. Use a damp cloth, tack cloth, or a vacuum with a brush attachment.
- Repair Imperfections: Fill any holes, cracks, or gouges with spackle or wood filler. Sand smooth once dry.
- Degrease: For surfaces that might have grease or oil residue (like kitchen cabinets or metal), use a degreaser and rinse thoroughly.
- Sanding: Lightly sand glossy or previously painted surfaces to create a better grip for the primer. Wipe away all sanding dust.
Masking And Protection
Proper masking is essential to protect areas you don’t want to prime or paint.
- Masking Tape: Use high-quality painter’s tape to mask off trim, windows, fixtures, and adjacent surfaces. Ensure the tape is pressed down firmly to prevent primer from seeping underneath.
- Plastic Sheeting/Drop Cloths: Use plastic sheeting or drop cloths to cover floors, furniture, and anything else that cannot be moved. For spray applications, especially with airless sprayers, overspray can travel further than you might expect, so comprehensive protection is vital.
Priming The Surface Itself (pre-priming)
In some cases, particularly when painting over dark colors, stains, or difficult surfaces, it might be beneficial to apply a coat of primer to the surface *before* using the sprayer for the main project. This ensures that the primer is properly adhered and provides a uniform base.
However, if the main goal is to apply primer as the first coat using the Wagner sprayer, this step is integrated into the main spraying process.
Spraying Technique With Wagner Sprayers And Primer
Achieving a professional finish requires more than just loading the sprayer and pulling the trigger. Technique plays a significant role.
Adjusting Sprayer Settings
- Material Flow: Adjust the material flow control on your Wagner sprayer to achieve an even, consistent stream of primer without runs or drips. Start with a lower setting and gradually increase it.
- Air Pressure (for HVLP): For HVLP sprayers, adjust the air pressure to achieve good atomization. Too little pressure will result in a spattered, uneven finish, while too much can cause excessive overspray.
- Fan Pattern: Many Wagner sprayers allow you to adjust the spray pattern from round to wide. For larger surfaces, a wider fan pattern is generally more efficient. For edges or smaller areas, a narrower pattern might be preferred.
Application Method
- Test Spray: Always perform a test spray on a piece of cardboard or scrap material before applying to your project. Check the spray pattern for evenness and consistency. Adjust settings as needed.
- Consistent Distance: Maintain a consistent distance (typically 10-12 inches) from the surface. Moving closer can lead to drips, while moving further away can result in a dry, uneven spray.
- Even Strokes: Move the sprayer in smooth, consistent, overlapping strokes. Overlap each pass by about 50% to ensure full coverage and avoid holidays (missed spots).
- Trigger Control: Start the stroke with the trigger released (moving the gun away from the surface) and release the trigger after completing the stroke (moving the gun away from the surface). This prevents paint buildup at the start and end of each pass.
- Vertical and Horizontal Passes: For complete coverage, especially on large surfaces, consider applying primer in both vertical and horizontal passes. For example, apply a vertical coat, then an overlapping horizontal coat.
Example: When priming a wall, start at the top and work your way down. Move the sprayer horizontally across the wall, overlapping each pass. Once you’ve completed a section horizontally, move down and repeat, overlapping your previous row. Then, consider a second pass vertically for maximum uniformity.
Cleaning And Maintenance After Spraying Primer
Proper cleaning and maintenance are crucial for the longevity of your Wagner paint sprayer and to prevent future issues.
Immediate Cleaning Procedures
- Flush with Water/Solvent: Immediately after finishing, flush the sprayer system with the appropriate cleaning solution. For water-based primers, this is warm, soapy water. For oil-based, use mineral spirits. Run the solution through the sprayer until it runs clear.
- Disassemble and Clean: Disassemble the gun, suction tube, and any other parts that came into contact with the primer. Clean them thoroughly with the appropriate solvent.
- Lubricate: For airless sprayers, apply a pump lubricant as recommended by the manufacturer to protect the pump seals.
Long-term Storage And Maintenance
- Dry Storage: Store the cleaned and dried sprayer components in a clean, dry place.
- Regular Checks: Periodically inspect your sprayer for any signs of wear or damage, especially before starting a new project.
- Filter Replacement: Regularly check and replace any filters in the system, as clogged filters can impede flow and affect spray quality.
Warning: Never allow primer or cleaning solvents to dry inside the sprayer. Dried primer is extremely difficult to remove and can permanently damage the sprayer. Clean the sprayer immediately after use.
Troubleshooting Common Primer Spraying Issues
Even with careful preparation, you might encounter problems when spraying primer. Here are common issues and their solutions.
Uneven Spray Pattern Or Sputtering
- Cause: Clogged tip, incorrect tip size, primer too thick, insufficient pressure, or air in the system.
- Solution: Clean the spray tip thoroughly. Ensure you’re using the correct tip size for the primer. Thin the primer if it’s too thick. Check sprayer settings for adequate pressure and ensure the suction tube is fully submerged. Bleed air from the system if necessary.
Runs And Drips
- Cause: Moving the sprayer too slowly, holding it too close to the surface, or applying too much material.
- Solution: Increase the speed of your passes, maintain a consistent distance (10-12 inches), and reduce the material flow setting if possible. Ensure you’re overlapping passes correctly.
Poor Coverage Or Holidays
- Cause: Sprayer not delivering enough material, inconsistent overlap, or primer too thin.
- Solution: Increase material flow, ensure proper overlap of strokes (50%), and check that the primer is not over-thinned. You may need a larger tip size or a more powerful sprayer for certain primers.
Sprayer Not Priming
- Cause: Clogged suction tube, air leak in the system, pump issues, or primer too viscous.
- Solution: Ensure the suction tube is submerged and clean. Check for and seal any air leaks. Verify the pump is functioning correctly. If the primer is extremely thick, it might exceed the sprayer’s capability.
Comparing Sprayer Types For Primer Application
Choosing the right type of sprayer can significantly impact your experience and the quality of the finish when working with primers. The right sprayer for primer application depends heavily on the viscosity (thickness) of the primer, the scale of your project, and the surface material. Because primers are often thicker and more viscous than standard latex paint, matching them to the correct equipment is critical to avoiding clogs and uneven coverage.
1. Airless Paint Sprayers
Airless sprayers use extreme hydraulic pressure (pumping up to 3,000+ PSI) to force paint or primer through a tiny spray tip, atomizing it without air.
- Best For: Large-scale projects such as entire room interiors, full house exteriors, new drywall, large fences, and masonry.
- Primer Handling: Exceptional. Most standard architectural latex, oil-based, and acrylic primers can be sprayed straight out of the can without thinning. Heavy-duty primers (like high-build drywall primers or masonry sealers) require the raw power of an airless system.
- Pros:
- Incomparable speed; covers large square footage rapidly.
- Forces thick, viscous fluids into porous or textured surfaces (like raw wood or rough drywall) for maximum adhesion.
- Can pull material directly from a 1-gallon or 5-gallon bucket.
- Cons:
- High output creates significant overspray, requiring extensive masking and protection.
- Harder to control on small, intricate pieces.
- High cleaning requirements (more fluid passages and longer hoses to flush).
2. High-Volume, Low-Pressure (HVLP) Sprayers
HVLP sprayers use a high volume of air at a low pressure (under 10 PSI at the cap) to gently push a soft, highly controlled stream of coating onto a substrate.
- Best For: Fine-finish work, including kitchen cabinets, furniture, doors, built-ins, and detailed millwork/trim.
- Primer Handling: Moderate to Challenging. Because primers are thick, standard entry-level or DIY-grade HVLP sprayers will usually require you to thin the primer significantly (using water or mineral spirits depending on the base) to prevent clogging.
- Pros:
- Exceptional transfer efficiency (more material lands on the target, less floats away into the air).
- Delivers a smooth, glass-like finish with virtually no stippling or orange peel, which is crucial under finish coats.
- High precision and tight control over the spray fan size.
- Cons:
- Slow coverage rate; poorly suited for whole-room walls or large exteriors.
- Thick bonding or shellac/oil-based primers can choke the turbine or require specialized, larger needle/nozzle sets (typically 1.5mm to 2.0mm+).
3. Pneumatic (Air-Assisted / Conventional Air) Sprayers
Pneumatic systems rely on an external air compressor to atomize the fluid as it leaves the spray gun nozzle.
- Best For: Ultra-fine workshop projects, furniture restoration, automotive touch-ups, and specialized lacquers or conversion varnishes.
- Primer Handling: Requires Dilution. Similar to HVLP, heavy industrial or architectural primers will struggle in standard compressed-air cups unless heavily thinned or paired with a pressure-pot setup.
- Pros:
- Delivers the absolute highest tier of atomization and surface smoothness.
- Cons:
- High overspray waste and airborne mist.
- Requires a separate, heavy-duty air compressor and moisture traps to keep compressed lines dry.
Quick Comparison Matrix
| Sprayer Type | Primary Use Case | Primer Thickness / Viscosity | Thinning Required? | Speed & Coverage | Finish Quality |
| Airless | Walls, ceilings, exteriors, new drywall | High (handles heavy primers easily) | Rarely (for standard architectural primers) | Very Fast | Good (texturized, built for topcoats) |
| HVLP | Cabinets, doors, furniture, trim | Low to Medium | Frequently (to prevent clogging) | Slow to Moderate | Excellent (ultra-smooth) |
| Pneumatic | Automotive, small crafts, fine wood details | Low | Yes | Slow | Professional / Mirror-like |
Decision Factors for Primer
If you are priming a kitchen cabinet overhaul or a piece of furniture: Lean toward an HVLP sprayer. A smooth primer base is essential here so that brush marks or texture don’t telegraph through your final paint layer. Be sure to check your sprayer’s manual for the maximum recommended tip size to handle sticky primers.
If you are priming drywall, plaster, or a whole room: Go with an Airless sprayer. You need the raw volume to pump thick drywall primer quickly without spending hours thinning material. Pair it with a fine-finish low-pressure tip (like a 310 or 312) if you want to minimize heavy texture.