You can spray paint a fake christmas tree to refresh its look, provided you use a paint specifically formulated for plastics and synthetic materials. This project typically requires 3 to 6 cans of paint for a standard 6-foot tree and takes about 4 to 6 hours of active work plus a full day for the paint to dry and cure properly.
Can you spray paint a fake christmas tree
Yes, you can safely change the color of a plastic tree if you choose the right materials and follow strict safety guidelines. Most artificial trees are made from polyvinyl chloride (PVC), which is a plastic that doesn’t hold standard wall paint well. Using the wrong type of paint often leads to a sticky, peeling mess that ruins the branches.
You must select a spray paint labeled for “plastic” or “all-purpose” use that specifically mentions it bonds to plastic surfaces. If you choose a paint that isn’t made for synthetic materials, the chemicals may react with the plastic, causing it to become brittle or melt slightly. Always work in a well-ventilated area, such as a garage with the door open or outdoors on a calm, dry day.
Avoid heavy layers that create a thick, flammable coating on the needles. If your tree has pre-installed lights, you must cover every single bulb and wire completely, as paint can damage the electrical components and pose a fire hazard.
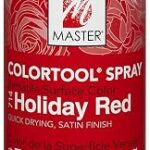
5 Best Spray Paint for Christmas Tree Options for Holiday Decor in 2026
What You Need to Get the Best Results
Before you start, gather the right supplies to ensure the job goes smoothly. Using subpar tools or the wrong paint will almost always result in a clumped, uneven finish that looks worse than the original tree.
- Plastic-bonding spray paint: Buy 3 to 6 cans depending on the density and height of your tree.
- Painter’s tape: Essential for masking off the metal pole or any non-plastic parts.
- Plastic drop cloth: Use a large sheet to protect your floor or driveway from overspray.
- N95 respirator mask: Always wear protection to avoid inhaling paint fumes.
- Safety glasses: Protect your eyes from mist and flying debris.
- Cardboard or masking paper: Used to shield the tree stand or trunk during the process.
How to Properly Apply Paint to an Artificial Tree
Follow these steps to achieve a professional-looking finish without damaging your tree. Rushing this process is the most common mistake that leads to clumpy, dripping paint.
- Clean the tree thoroughly: Set up your tree and use a damp cloth to wipe down every branch to remove dust and oils. If the tree is dirty, the paint won’t stick, and you’ll end up with patches that flake off after a few weeks.
- Protect the environment: Lay your drop cloth on the ground and place the tree in the center. If you’re working indoors, you must open windows and use fans to move air, but working outside is much safer and easier for this specific task.
- Mask the non-plastic parts: Use painter’s tape to cover the center metal pole and any electrical light strands. If you leave the lights exposed, the paint will block the glow and may cause the plastic casing of the bulbs to overheat.
- Test the paint on a hidden spot: Pick a small, low-hanging branch near the bottom and spray a test patch. Wait 30 minutes to see how the color looks and ensure the plastic doesn’t react poorly to the solvent in the paint.
- Apply light, even coats: Hold the spray can 10 to 12 inches away from the branches. Use a sweeping motion, moving from the inside of the branch outward, and apply very thin layers rather than trying to cover everything in one pass.
- Rotate and repeat: Let each layer dry for at least 20 minutes before adding the next. You’ll likely need 2 or 3 light coats to achieve full coverage, but don’t rush the drying time between them or the paint will pool and drip.
- Let the tree cure: Even if the paint feels dry to the touch after an hour, let the tree sit in a ventilated area for at least 24 hours. This allows the chemicals to fully evaporate so your living room doesn’t smell like fumes when you bring it inside.
Comparing Paint Types and Expected Results
Choosing the right finish affects both the look and the longevity of your project. The table below outlines how different paint varieties perform on artificial plastic needles.
| Paint Type | Finish Quality | Durability | Best Use Case |
|---|---|---|---|
| Matte Plastic Paint | Natural, soft look | High | Realistic green or flocked white trees |
| Glossy Enamel | Shiny, reflective | Low | Bright, bold colors for modern themes |
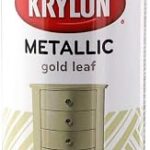
| Metallic Spray | Shimmering, festive | Medium | Accents or gold/silver vintage styles |
| Textured Snow | Flocked, heavy | High | Creating a “freshly fallen snow” effect |
If you choose glossy enamel, expect the finish to crack within two seasons due to the plastic’s natural expansion. Use matte paints for high-traffic areas where you want to hide brush strokes.
Always check your needle material. If the branches feel waxy or slick, apply a plastic-bonding primer first. Without this step, even high-quality paint will flake off during storage.
If you need a quick refresh, use metallic sprays for small accents rather than full coverage. They dry in under thirty minutes, while textured snow requires at least four hours to cure fully. If the paint remains tacky to the touch, don’t pack the tree away. Storing damp paint causes needles to fuse together permanently.
Why Does Mine Keep Coming Out Clumpy or Sticky?
If your tree looks uneven or feels tacky, it’s usually due to environmental factors or incorrect technique. Recognizing these common pitfalls helps you avoid them before you ruin the entire tree.
Why is the paint dripping off the needles?
You’re likely holding the spray can too close to the tree or applying the paint too heavily in one spot. When you spray too close, the paint builds up quickly and doesn’t have time to bond, causing it to slide off the slick plastic surface. Always keep the can at least 10 inches away and keep your hand moving constantly while you spray.
Why does the paint feel sticky days later?
High humidity or cold temperatures prevent the solvents in the paint from evaporating correctly. If it’s raining or the air is very damp, the paint will stay tacky for a long time.
Why is the color flaking off when I touch it?
You probably didn’t clean the dust off the needles before starting, or you skipped the test patch and used a paint that wasn’t designed for plastic. Dust acts as a barrier between the paint and the plastic, meaning the paint is sitting on top of the dirt rather than bonding to the tree. If you’ve already painted, there isn’t a way to fix this; you’ll have to live with the flaking or strip the paint with a plastic-safe solvent, which is difficult and often damages the tree.
Why do the lights look dim or distorted?
You didn’t mask the bulbs carefully enough, or the paint has created a layer that prevents light transmission. If you got paint on the bulbs, you can try to gently scrape it off with a plastic scraper once it’s fully cured. If the paint is on the wire insulation, leave it alone to avoid damaging the electrical integrity of the light string.
When Should You Consider Buying New Instead?
You should decide whether to paint or replace your tree based on its current condition and the cost of supplies. If your tree is already losing needles or the metal frame is bent, painting it’s only a temporary fix that won’t address the structural issues.
A quality spray paint project is inexpensive when you factor in the paint, tape, and protective gear. If you can find a brand-new tree on sale for a similar cost, buying new is almost always the better choice. Painting is best reserved for trees that are in excellent structural shape but have gone out of style, such as an older green tree you want to turn white, or a tree that has faded significantly due to sun exposure.
Tip: If you’re going for a flocked look, use a specific “snow” spray rather than standard white paint. Flocking sprays have a thicker, fibrous consistency that mimics real snow much better than flat white paint ever could.
Frequently Asked Questions
Is it safe to paint a pre-lit artificial tree?
It isn’t recommended, but if you must, you have to cover every single light bulb and all exposed wires with tape. Paint can cause the bulbs to overheat or create a fire hazard by trapping heat against the plastic housing, so it’s safer to strip the lights off if possible.
Does painting the tree make it more flammable?
Yes, adding any chemical coating can change the fire-safety rating of your tree. Be aware that applying any spray paint to an artificial tree may compromise its original fire-retardant properties.
Can I change a green tree to black or silver?
You can definitely change the color, but dark colors like black or metallic silver require more coats than lighter colors. You’ll need to apply a light base coat first, let it dry completely, and then add your final color to ensure the original green doesn’t peek through the gaps in the needles.
How long does the paint last on a fake tree?
When applied correctly to a clean surface, the paint should last for several seasons of regular holiday use. If you store the tree in a cool, dry place and avoid crushing the branches during packing, the finish will remain stable, though you might need to touch up a few spots each year.
Will the paint smell stay in my house?
The smell will disappear within 48 to 72 hours if you let the tree cure in a well-ventilated area before bringing it inside. If you bring the tree indoors while it’s still “off-gassing,” the chemical odor will linger in your living room for a week or more.
Can I use acrylic craft paint with a brush?
Don’t use brush-on acrylic paint, as it will crack, peel, and clump on the flexible plastic needles. Spray paint is the only way to get an even, professional finish because it atomizes the liquid into a fine mist that clings to the intricate shapes of the needles without leaving brush marks.
Conclusion
Refining your holiday decor can be a rewarding project that saves you money while giving your home a fresh, custom look for the season. Before you commit to the entire tree, start with a small, inconspicuous section to ensure you like the color and finish. Taking your time during the application phase ensures your hard work lasts for years to come.