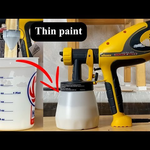
Thin latex paint by mixing 2 to 4 fluid ounces of water per quart, a 6% to 12% ratio. Start at the lower end, test on cardboard, and add liquid in single-ounce steps until the mist flows cleanly.
What Supplies You Need Before You Start
Latex paint is thick. Gather these materials to thin your paint:
- Clean, room-temperature water or a dedicated commercial latex conditioner (such as Floetrol)
- A clean, empty plastic mixing bucket (one-quart or one-gallon size)
- A wooden or plastic stir stick
- A cone-shaped mesh paint strainer (fine nylon mesh)
- A funnel or viscosity test cup (such as a Ford #4 or Zahn #2 cup, if your spray kit includes one)
- A measuring cup with fluid-ounce markings
- Scrap cardboard, poster board, or plywood for test patterns
- Protective eyewear and a NIOSH-approved respirator rated for paint mist
How to Thin Latex Paint for Spraying
Follow these steps to reduce the paint without damaging its resins.
- Strain the raw paint into a clean mixing bucket. Pour the unthinned latex through a fine mesh strainer into an empty container to trap dried flakes, dust, and congealed skin that settle along the inner rim of the can. These tiny particles will instantly clog a spray tip regardless of how much liquid you add to reduce viscosity.
- Measure your starting liquid volume. Pour clean, room-temperature water into a measuring cup at a ratio of 2 fluid ounces per quart of paint, which represents a safe 6% starting reduction. If you’re preparing a full gallon, start with 8 fluid ounces of liquid so you don’t over-saturate the chemical binders on your initial try.
- Blend the liquid into the paint slowly. Pour roughly half of your measured water directly into the bucket and stir gently in smooth, circular sweeps for two minutes. Avoid rapid, whipping strokes, which introduce trapped air bubbles into the liquid that can burst inside your gun’s fluid nozzle and cause irregular sputtering across the project surface.
- Check the paint run-off from your stir stick. Lift the stir stick four inches above the bucket and watch how the fluid flows off the flat end. Properly thinned latex should run off the stick in a continuous, smooth stream for two to three seconds before breaking into individual, steady droplets rather than falling in heavy, sluggish clumps.
- Time the flow with a viscosity cup if your kit has one. Submerge the small plastic cup fully into the mixture, lift it out, and use a stopwatch to count the seconds until the solid stream exiting the bottom hole breaks for the first time. Most siphon and gravity systems need a run-out time between 25 and 40 seconds, depending on the manufacturer’s exact specification chart.
- Pour the thinned mixture through a second strainer into the gun cup. Position a fresh mesh strainer directly over your sprayer’s canister and pour the conditioned paint inside until the reservoir is roughly three-quarters full. This secondary filtration catches any dried pigments loosened from the bucket walls during your initial stirring phase.
- Perform a test spray on cardboard. Hold the gun perpendicular to your test board at a distance of 8 to 10 inches, pull the trigger fully in a sweeping motion, and inspect the resulting pattern. If the spray fan deposits an even oval mist with tiny, uniform droplets, the mixture is ready; if it spatters thick dots or leaves heavy, raised edges, stir in one additional ounce of liquid per quart and test again.
Tip: Always set aside one cup of unthinned paint from your original container before you begin mixing so you can quickly thicken the batch if you accidentally add too much water.
How Much Water to Add to Latex Paint
Different paint sprayers generate distinct fluid pressures and move liquid through varying nozzle orifices. High-volume, low-pressure (HVLP) units move fluid with warm air volume and need lighter paint, while standard airless rigs use massive hydraulic pressure and frequently run unthinned material through wider tips.
| Gun Type | Paint Volume | Starting Water Ratio | Maximum Recommended Water | Target Viscosity (Ford #4 Cup) |
|---|---|---|---|---|
| HVLP Gravity Feed | 1 Quart | 2 fl oz (6%) | 4 fl oz (12%) | 25–35 seconds |
| HVLP Gravity Feed | 1 Gallon | 8 fl oz (6%) | 16 fl oz (12%) | 25–35 seconds |
| Pneumatic Siphon Gun | 1 Quart | 3 fl oz (9%) | 5 fl oz (15%) | 20–30 seconds |
| Pneumatic Siphon Gun | 1 Gallon | 10 fl oz (8%) | 20 fl oz (15%) | 20–30 seconds |
| Handheld Electric Sprayer | 1 Quart | 1.5 fl oz (5%) | 3 fl oz (10%) | 30–40 seconds |
| Handheld Electric Sprayer | 1 Gallon | 6 fl oz (5%) | 12 fl oz (10%) | 30–40 seconds |
| Airless Rig (Tip < 0.015″) | 1 Gallon | 4 fl oz (3%) | 8 fl oz (6%) | Run unthinned if tip is 0.017″+ |
The exact balance depends directly on the brand of paint and the specific formulation you buy.
Water vs. Commercial Paint Conditioners: Which Should You Use?
Clean water is the most accessible thinner for water-based coatings, but it works by diluting the formula. Adding up to 10% water by volume rarely disrupts the paint, but pushing beyond that threshold weakens the resin matrix that allows latex to cling to bare surfaces and resist scuffs.
Commercial conditioners like Floetrol use water-soluble polyether compounds that reduce the fluid drag of the paint without diluting the binder structure. A conditioner extends the open drying time, allowing droplets to flow into a smooth surface before drying.
- Use clean water if you’re spraying interior drywall, applying basic primer coats, working in cool indoor temperatures, or trying to finish a project without purchasing extra additives.
- Choose a commercial additive if you’re coating detailed wood cabinets, hanging interior doors, spraying exterior trim during hot, dry weather, or dealing with expensive high-gloss enamel paints that show surface texture easily.
If you decide to use a commercial additive, treat it as a direct substitute for water in your ratio calculations.
Can You Add Too Much Water to Latex Paint?
Yes, adding more than 15% water by volume degrades the fundamental chemistry of latex paint. Latex relies on acrylic and vinyl resins suspended in an emulsion; as the carrier liquid evaporates, those resin particles knit together into a continuous, flexible plastic sheet that locks the color pigments onto the wall.
Diluting past this boundary prevents the resin solids from forming a durable chemical bond. This causes three problems:
- Pigment separation and uneven coverage. The paint loses its opacity, turning semi-transparent and requiring three to four wet passes to hide minor background colors or raw drywall patches.
- Sagging and runs. Thin paint lacks the natural surface tension to stay in place on vertical walls or trim molding, resulting in runs, drips, and pooled liquid beneath raised edges.
- Flaking and early chalking. Once dried, the paint coat will easily scratch off with a fingernail or flake away during routine cleaning because the binder failed to grip the underlying substrate.
The trade-off for adding liquid is clear: higher thinning ratios produce a glass-smooth finish with less orange-peel texture, but you lose one-coat hiding power and increase your risk of paint runs on upright surfaces.
What Nozzle Size and Pressure Settings Should You Choose?
Thinning paint is only half the equation; your fluid tip diameter and delivery pressure must match the viscosity of your reduced material.
For standard thinned latex, pick a fluid tip between 1.8 mm and 2.2 mm. Handheld cup sprayers often ship with a 2.0 mm or 2.5 mm nozzle, handling paint thinned with 5% to 10% water.
If you’re using an airless rig, nozzle sizes follow a three-digit code stamped directly on the safety guard. A 515 tip creates a 10-inch fan with a 0.015-inch orifice, which requires light thinning (roughly 4 to 6 ounces of water per gallon). A 517 or 519 tip can pull raw, unthinned latex straight from the bucket.
Adjust your gun controls using this order of operations:
- Open your air control valve to maximum delivery pressure.
- Dial the fluid adjustment knob back until no paint passes when you squeeze the trigger.
- Turn the fluid knob outward two full rotations while triggering the gun against scrap cardboard.
- Continue opening the fluid flow until the gun produces a full, even fan pattern without heavy streaks at the top or bottom edges.
How to Test Your Spray Pattern Before Painting
Verify your fluid pattern on a vertical scrap surface before spraying your work piece. Pin a 2-foot square of cardboard to a wall at chest height.
Hold the gun 8 to 10 inches away, square to the surface. Sweep horizontally, pulling the trigger after your arm moves and releasing it before the stroke ends. Examine the strip under bright light.
Good Pattern: [ . . : : : : : : : . . ] – Soft, atomized edges, uniform wet sheen
Undiluted Spatter: [ : : . : . : : ] – Heavy droplets, coarse sandpaper feel
Tails and Fingers: [=== . . : : : . . ===] – Thick bars on top and bottom edges
Over-thinned Run: [ ||||||||||||||||||||| ] – Paint sags downward instantly
If the mist lands in tiny, evenly distributed speckles that melt together into a flat film within fifteen seconds, your viscosity is set correctly.
Safe Handling, Air Quality, and Workspace Preparation
Atomized paint creates fine airborne particulates that settle on nearby surfaces and enter the lungs if you work without proper protection. When paint is pushed through a high-pressure nozzle, the mist stays suspended in the air significantly longer than the heavy spatter generated by an ordinary paint roller.
For personal protection, wear safety goggles that seal around your eyes and a tight-fitting half-mask respirator equipped with organic vapor cartridges and P95 particulate pre-filters. The Environmental Protection Agency guide on paint indoor air quality explains that indoor paint vapors and volatile organic compounds can build up quickly without continuous mechanical exhaust, so keeping clean air circulating through your work zone is critical.
Fixing Common Thinning and Spraying Problems
Why is my spray gun spitting and throwing heavy droplets?
A spitting gun indicates that air is entering the fluid path or paint has dried inside the air cap horns. First, loosen and remove the outer air cap, soak it in warm soapy water, and clean the tiny side passages using a soft nylon bristle brush or a wooden toothpick.
If the nozzle is clear, check for a loose fluid nozzle or an unseated siphon tube. Tighten the fluid nozzle with your gun’s service wrench, ensure the cup lid gasket is completely flat without paint buildup, and check that your paint has been properly strained.
Why does the paint look like a bumpy orange peel after drying?
An orange-peel finish happens when the paint droplets dry before they have enough time to level out, or because the paint was slightly too thick to atomize cleanly.
Why is the paint running down the surface in long drips?
Runs happen when you add too much water to your paint, hold the gun too close to the surface, or move your arm too slowly across the project.
To fix runs, let the paint dry for 24 hours, sand drips flat with 220-grit sandpaper, and wipe away dust.
Why does the paint spray fine at first and then stop flowing?
Your fluid tip or internal pickup filter is slowly clogging with dried paint flakes pulled from the bottom of the canister.
Stop spraying, detach the canister, and unscrew the fluid tip.
Frequently Asked Questions
Can I thin latex paint with rubbing alcohol or mineral spirits?
No, never mix alcohol or mineral spirits into water-based latex paint. Mineral spirits cause water emulsions to curdle into useless rubbery globs, while alcohol forces the acrylic resins to coagulate rapidly. Use only clean tap water or a dedicated water-based paint conditioner to thin your latex paint safely.
How do I know if my paint is too thin to use?
Your paint is too thin if it runs off your stir stick like pure water without forming droplets, or if it immediately sags on a vertical test board. Over-thinned paint appears translucent on your surface, requiring three or four coats to hide standard primer or light wood grain underneath.
Does thinning latex paint change its finished color?
Thinning with water doesn’t change the dried pigment color if you keep dilution under 10% by volume. However, heavy over-thinning spreads the color pigments thin, making the dry coat look lighter or blotchy until you apply multiple layers to rebuild the proper film thickness across your project.
Can I store latex paint that has already been thinned with water?
You can store thinned paint for several months if you seal it tightly inside a clean plastic bucket and keep it in a cool place. However, thinning paint reduces the concentration of factory-added biocides, which can lead to spoilage over long periods, so discard any stored mixture that develops a sharp, sour smell.
Do I need to thin latex paint for an airless sprayer?
Most airless sprayers don’t require thinning if you run a standard 517 tip size and set your fluid pressure correctly. If you use a compact homeowner airless unit or a fine 513 finishing tip, stir in 4 to 8 ounces of clean water per gallon to ease fluid flow.
How much Floetrol should I use instead of water?
Add Floetrol at a ratio of 8 fluid ounces per gallon of paint, or 2 fluid ounces per quart, to match a safe starting dilution rate. Stir it gently into your paint bucket until completely incorporated, and avoid exceeding 16 fluid ounces per gallon to protect the resin’s drying integrity.
Final Thoughts
Once your mixture is ready, pour it through a fine-mesh strainer to catch any dried clumps that might clog the nozzle. You’ll find that a smooth, consistent spray makes the whole project go much faster.