Paint peeling after painting happens because moisture, dirt, or the wrong primer broke the bond between the new coat and the wall. You’ll see it start within days if the surface wasn’t cleaned, or weeks later if trapped water pushes it off from behind. Fixing it means scraping the loose edges, sanding them smooth, priming bare spots, and repainting just that area.
The exact cause decides your fix, since a bathroom with poor ventilation needs a different approach than a sun-facing exterior wall, and the type of paint you used, how long you waited between coats, and whether the old layer was oil-based all change what you have to do next.
Who gets paint peeling after painting
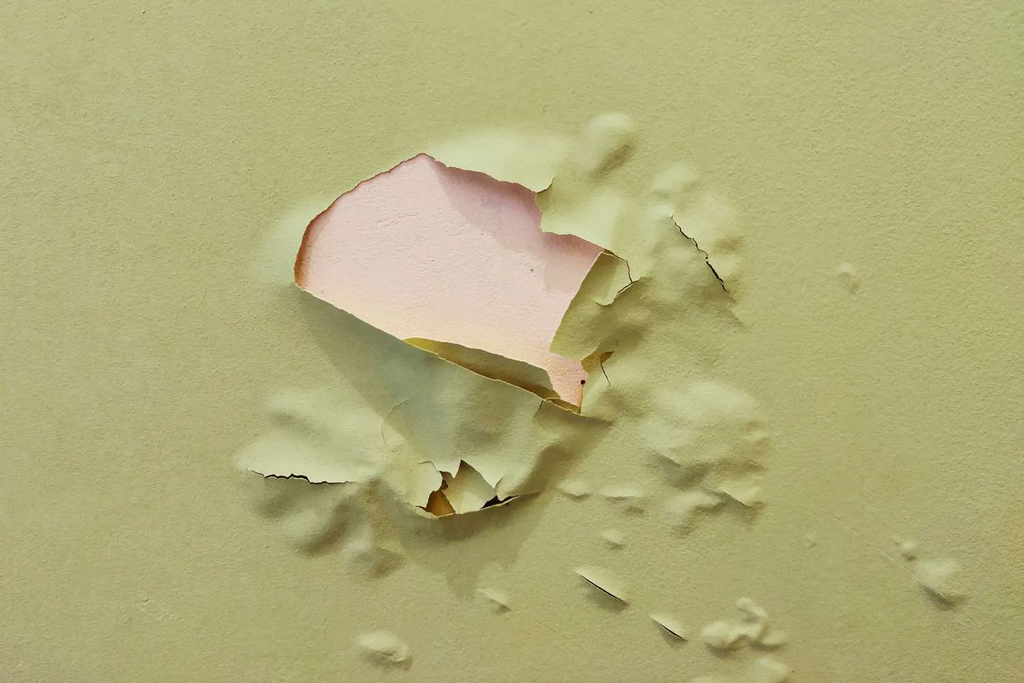
Three different people usually search for this problem, and they don’t need the same answer. The first is someone who painted a room last weekend and already sees flakes on the floor. They have basic tools, a leftover can of latex paint, and they want to know if they can patch it tonight without redoing the whole wall.
The second person is dealing with an older house where layers are separating. They might have oil-based paint underneath a newer water-based coat. They’re trying to figure out if scraping will work or if the whole surface needs stripping down to bare plaster.
The third is looking at an exterior wall blistering in the sun. They need to know if it’s safe to scrape outside, what weather conditions matter, and whether the wood underneath has started to rot.
This page serves the first two readers best. It covers interior walls and small exterior patches where the damage stays under a few square feet. If you’re facing large areas of rotting wood, lead paint dust, or structural moisture coming through a foundation, stop reading here.
Those jobs require a licensed contractor or a mold specialist. The rest of these steps assume you’re working on a dry, sound surface smaller than 3 feet by 3 feet, using standard latex or acrylic paint.
What breaks the paint bond
Four things actually cause the film to separate from the surface beneath it, and getting the wrong one costs you a second failed repair.
Moisture is the most common reason. Water vapor moving through drywall or wood pushes the film outward until it blisters and lets go. You can check this by taping a 12-inch square of clear plastic wrap tightly against the wall overnight. If condensation forms under the plastic by morning, water is migrating through the substrate. Don’t paint over that until you fix the leak or add ventilation.
Surface contamination comes next. Dust, grease, soap residue, and furniture polish leave an invisible layer that blocks adhesion. Latex paint won’t grip a glossy or dirty surface. Run your hand across the wall before you start; if it feels slick or leaves a dark smudge on your fingers, you must wash it with trisodium phosphate or a heavy-duty degreaser first.
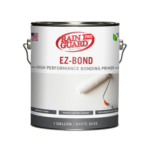
Primer mismatch causes failures that take weeks to show up. If you applied water-based paint directly over old oil-based enamel without a bonding primer, the new coat will eventually slide off. Test the old layer by rubbing it with a cotton ball soaked in denatured alcohol. If the color transfers to the cotton, it’s latex. If it stays hard and clean, it’s oil-based and needs an oil-to-latex transition primer.
Temperature during application changes how the resins cure. Painting when the room is below 50°F or above 90°F prevents the polymers from linking properly. Check your paint can’s label for the manufacturer’s specific temperature range, as formulas differ.
The mistake people make here is assuming the air temperature matches the wall temperature. An exterior wall in direct afternoon sun can be 30°F hotter than the air around it, causing the water in latex paint to flash off before the binder sets.
7 Best Primer for Peeling Paint (Tested For Lock Down Damaged and Flaking Paint)
How to fix peeling paint on walls
You need a putty knife, 120-grit sandpaper, a tack cloth, primer, and matching topcoat. Work in a well-ventilated room, and wear a dust mask while scraping and sanding.
- Press the edge of your putty knife flat against the wall beside the damaged spot. Push gently under the lifted edge to remove only the loose material. Stop scraping the moment the blade meets firm resistance; forcing it tears good paint away.
- Sand the scraped edges with 120-grit sandpaper until the transition between bare wall and old paint is completely smooth. You shouldn’t feel a ridge when you run your finger across it.
- Wipe the sanded area with a dry tack cloth to pull out every speck of dust. Any powder left behind acts like tiny ball bearings under your new coat.
- Apply a thin coat of bonding primer over the bare spots using a small brush. Feather the edges out into the surrounding paint. Let it dry for the exact time printed on the primer can—usually 1 to 2 hours for water-based primers at 70°F.
- Lightly sand the dried primer with 220-grit paper so the topcoat has a slightly rough surface to grip. Wipe it again with your tack cloth.
- Brush or roll the first coat of your topcoat paint over the primed area. Keep the layer thin. Thick applications trap solvents that bubble up later. Wait at least 4 hours, or whatever the can specifies for your room’s humidity, before adding another layer.
- Apply a second thin coat, feathering the outer edges outward to blend with the existing wall color.
The judgment call that separates a lasting repair from a quick cover-up is knowing when to prime the entire wall instead of just the patched spot. If the peeled area sits at eye level in bright light, spot-priming often leaves a visible texture difference called flashing. In that case, prime the full wall section from corner to corner before applying your topcoat.
If the bare surface reveals crumbling plaster, black mold, or soft rotting wood, stop. Repairing those substrates requires professional assessment to prevent structural or health risks.
Situations that change the repair method
Different surfaces and environments demand adjustments to the basic scraping and repainting process. Here is how the approach shifts depending on what you’re actually working on.
| Surface or condition | Action required | Effort involved | Watch for this warning sign |
|---|---|---|---|
| Drywall with water stains | Seal stain with shellac primer first | Adds one extra drying hour | Brown rings bleeding through topcoat |
| Wood trim or doors | Sand down to bare wood entirely | High effort, takes longer | Splintering grain or deep cracks |
| Bathroom ceiling | Use mildew-resistant bath paint only | Same time, specific product | Black spots returning within weeks |
| Exterior siding | Scrape, prime, wait for dry weather | Moderate effort overall | Soft or spongy boards underneath |
| Old oil-based enamel | Apply high-adhesion bonding primer | Low effort, critical step | New latex wrinkling immediately |
| Plaster walls | Stabilize loose keys before filling | High effort, careful work | Hollow sound when tapping wall |
| Metal radiators or pipes | Use heat-resistant metal enamel | Same time, specific product | Paint bubbling when heater runs |
A shellac-based primer is necessary for water stains because latex primers are porous enough to let the stain bleed through. For bathrooms, standard wall paint doesn’t contain the mildewcides needed to survive constant steam exposure. Always match the product to the environment, not just the color.
5 Best Kit For Cabinet Chip Repair(Tested On Dents, Dings, and Gouges)
Details that keep paint attached
Preparing the surface correctly
Washing the wall matters more than sanding it. Grease from cooking or oils from hands create a barrier that no amount of scraping fixes. Wash the area with a sponge and TSP substitute, then rinse it with clean water and let it dry completely. Rushing this step traps moisture under the new film.
Feathering the edges is where repairs either disappear or stand out. Don’t just sand the bare spot; sand the perimeter of the remaining old paint so it slopes down to the wall gradually. A sharp edge casts a shadow under fresh paint, making the patch obvious even if the color matches perfectly.
Applying the new coats
Thin layers cure harder than thick ones. When you load your brush or roller heavily to save time, the outside dries while the inside stays wet. That trapped solvent eventually pushes its way out, creating new blisters. Two thin coats always hold better than one heavy one.
Waiting for the right conditions prevents premature failure. Don’t paint if rain is expected on exterior walls within 24 hours, or if the indoor humidity is above 85%. High moisture slows curing and weakens the final bond. Check the weather forecast and your paint manufacturer’s technical data sheet for their specific humidity limits before opening the can.
Why your paint keeps lifting
When the repair fails again, the symptom tells you exactly which part of the process went wrong. Match what you see to the table below to find the real cause.
| What you notice | What it usually means | What to do first | How to stop it happening again |
|---|---|---|---|
| Blisters filled with liquid | Moisture trapped behind film | Pierce, drain, find water source | Fix plumbing leaks or ventilation |
| Flakes curling inward | Paint applied too thickly | Scrape curls, sand smooth | Apply thinner coats next time |
| Whole sheets sliding off | Wrong primer over oil paint | Strip back, apply bonding primer | Test old paint with alcohol first |
| Chalky dust under new coat | Surface wasn’t washed properly | Remove, wash with TSP, reprime | Always clean before any sanding |
| Cracking like alligator skin | Topcoat dried faster than base | Scrape all cracked areas | Follow recoat times on can |
| Peeling only near windows | Condensation or UV degradation | Improve window seals, repaint | Use high-quality interior paint formulated for moisture resistance |
Blisters specifically mean water is actively moving through the wall. No paint formulation can resist continuous hydrostatic pressure. You must locate the leak, exhaust fan failure, or missing vapor barrier before spending money on more primer and topcoat.
Safety rules for paint removal
Scraping old paint creates dust, and in homes built before 1978 in the United States, that dust likely contains lead. The Environmental Protection Agency mandates specific practices for disturbing painted surfaces in pre-1978 housing to prevent lead poisoning.
Never dry-sand or use a heat gun on suspected lead paint without proper training and certified equipment. If your home falls into that age range, buy an EPA-recognized lead test kit from a hardware store and test each distinct paint layer separately before you start scraping.
Even with modern latex paints, ventilation prevents fume buildup from drying paint. Primers, especially oil-based and shellac varieties, release volatile organic compounds as they dry. Open windows and run a box fan pointing outward to pull fumes out of the room. Don’t sleep in a freshly primed space until the odor is completely gone.
Dispose of non-lead paint chips in a sealed bag rather than sweeping them loosely into the regular trash, and follow local hazardous waste rules for any lead-containing debris. If you discover mold growing on the bare drywall underneath the peeled paint, stop working.
Disturbing mold spreads spores throughout your HVAC system. Small patches under 10 square feet can be cleaned with appropriate fungicides, but larger infestations require professional remediation.
Time and materials required
The cost to fix a peeling patch is mostly measured in your time, not money. A single 2-foot by 2-foot repair takes about 3 to 4 hours of active work spread across a day, because you have to wait for the primer and each topcoat to dry between steps. Skipping those drying intervals ruins the repair.
Materials for a basic patch run low. A quart of bonding primer costs less than a gallon of topcoat, and you rarely need more than a pint for small spots. Sandpaper, a tack cloth, and a cheap angled brush add very little to the total. The expensive part is buying a full gallon of custom-matched paint if you don’t have the original can left over.
Labor costs shift dramatically based on the substrate. Patching drywall is cheap. Repairing plaster that crumbles when you scrape it requires setting compound, mesh tape, and multiple skim coats, which doubles your time. Wood rot demands cutting out the damaged section and splicing in new lumber before you even think about primer.
If you hire a professional painter instead of doing it yourself, they typically charge a minimum service fee regardless of how small the patch is. That minimum often exceeds the cost of the materials for the whole room. Compare the size of your damaged area against the local hourly rate to decide if DIY makes sense.
Keeping the repaired surface intact
Once the patch cures, it needs the same care as the rest of the wall. Curing isn’t the same as drying to the touch. Latex paint reaches full hardness about 30 days after application, according to most major manufacturers. During that month, don’t scrub the area, lean furniture against it, or hang heavy items on it.
Control the room’s humidity to protect the new bond. Keep indoor relative humidity between 30% and 50% using exhaust fans in kitchens and bathrooms. Consistent moisture swings cause wood and drywall to expand and contract, which stresses the paint film from underneath.
Clean the walls gently when they get dirty. Use a soft sponge and mild dish soap diluted in warm water. Abrasive scrubbers or harsh chemical cleaners strip the gloss and weaken the top layer, making it easier for the next bump to start a new peel.
Check the repaired spot once a season. Run your fingernail lightly across the edges where the new paint meets the old. If you feel it catching or lifting, address that tiny edge immediately with a dab of primer and paint before it spreads back across the whole patch.
When scraping and repainting won’t work
This repair method fails when the underlying surface is structurally compromised. If your putty knife sinks into soft, spongy drywall or wood, you aren’t dealing with a paint problem. You have water damage that requires replacing the building material itself. Painting over rot traps moisture and accelerates decay.
Homes built before 1978 present a legal and health boundary. If a lead test kit turns positive, dry scraping and sanding become illegal and dangerous without certified containment procedures. Hire an EPA-certified renovator to handle lead paint removal safely.
Peeling across an entire exterior wall usually points to systemic issues like missing house wrap, failed caulking, or severe vapor drive from the inside out. Spot-fixing one corner won’t stop the rest of the wall from failing next summer. These widespread problems need a building envelope inspection, not a paintbrush.
Finally, if the peeling follows a distinct pattern—like straight lines along studs or joists—it suggests thermal bridging or condensation forming on cold framing members behind the drywall. Adding paint won’t insulate the wall. You need to address the insulation or ventilation deficit first.
Frequently asked questions
Can I just paint over peeling paint?
No, painting over loose flakes guarantees the new coat will fall off with them. The new paint bonds to the old flake, not the wall. You must scrape away everything that lifts easily before applying primer. Leaving unstable edges hidden under fresh paint wastes your materials and time.
Why is my newly painted wall peeling?
Fresh paint peels when it’s applied over dirt, grease, moisture, or incompatible old finishes. Skipping the cleaning step or using latex over unprimed oil paint are the usual culprits. Check the surface prep you did; the failure happened before you opened the paint can.
How long does it take for paint to peel?
Poor adhesion shows up anywhere from 24 hours to several months after application. Moisture-related blistering often appears within the first week. Primer mismatch failures typically take 3 to 6 months to fully separate as the resins slowly reject each other.
Is it safe to scrape peeling paint myself?
It’s safe only if the paint tests negative for lead and you wear a dust mask. Homes built before 1978 require a lead test kit before any scraping begins. Never use a power sander on unknown paint, as it aerosolizes toxic particles throughout the room.
What happens if I don’t use primer?
Skipping primer over bare drywall, wood, or old oil paint leads to uneven absorption and poor adhesion. The topcoat soaks into porous spots differently, causing flashing and early peeling. Primer seals the surface and provides a uniform gripping layer for your finish coat.
Does humidity cause paint to peel?
Yes, high humidity introduces moisture into the substrate, pushing the paint film away from the wall. Bathrooms, kitchens, and basements without proper exhaust fans suffer the most. Keep indoor humidity below 50% to maintain the adhesive bond over time.
Will peeling paint spread if I leave it?
Yes, exposed edges catch air currents and physical bumps, lifting further over time. Moisture also enters the gap, degrading the surrounding bond. A quarter-sized chip left alone often becomes a dinner-plate-sized failure within a year.
Do I need to repaint the whole wall?
Not always, but spot repairs frequently flash under bright light due to texture differences. If the peeled area is small and low on the wall, a feathered patch works. For large or highly visible spots, rolling the entire wall ensures a uniform finish.
Conclusion
Start by testing the loose edges with your fingernail to map exactly how far the damage reaches before buying supplies. Once you scrape, prime, and apply two thin coats, the repaired spot should feel flush and look uniform within a few days of curing. If the wall continues to blister or weep moisture after you’ve followed the preparation steps, stop and call a contractor to investigate what’s happening inside the wall cavity.