You can paint a christmas wreath by applying acrylic craft paints to a fresh or artificial base, which usually takes about 2 to 4 hours to complete depending on the size and detail. You’ll need a sturdy wreath frame, water-resistant outdoor paint, and a variety of brushes to ensure your design lasts through the winter season.
5 Best Christmas Red Spray Paint Picks for Holiday Projects in 2026
Steps for Creating a Painted Holiday Wreath
Follow these steps to transform a plain wreath into a custom piece of holiday decor. Whether you’re using a grapevine, evergreen, or artificial frame, these steps provide a reliable way to get a professional look at home.
- Prepare your workspace by covering a large table with newspaper or a plastic drop cloth to catch any stray paint drips or debris. Ensure you have good lighting so you can see the texture of your materials clearly, as this helps you apply paint evenly across different surfaces.
- Clean the wreath base thoroughly by shaking it outside to remove loose needles, dust, or dirt that might prevent the paint from sticking properly. If you’re using a natural vine base, look for any broken twigs or loose ends and trim them with heavy-duty scissors before you start your project.
- Apply a base coat of spray primer or outdoor-rated acrylic paint to the entire surface if you want a uniform color background. Hold the nozzle about 10 inches from the wreath and use steady, sweeping motions to avoid pooling, which can create thick, uneven spots that take too long to dry.
- Paint your primary designs or patterns using a medium-sized flat brush, focusing on the wider areas of the wreath first. Use thin layers instead of one thick coat to prevent cracking, especially on flexible materials that might move when you eventually hang the wreath on your door.
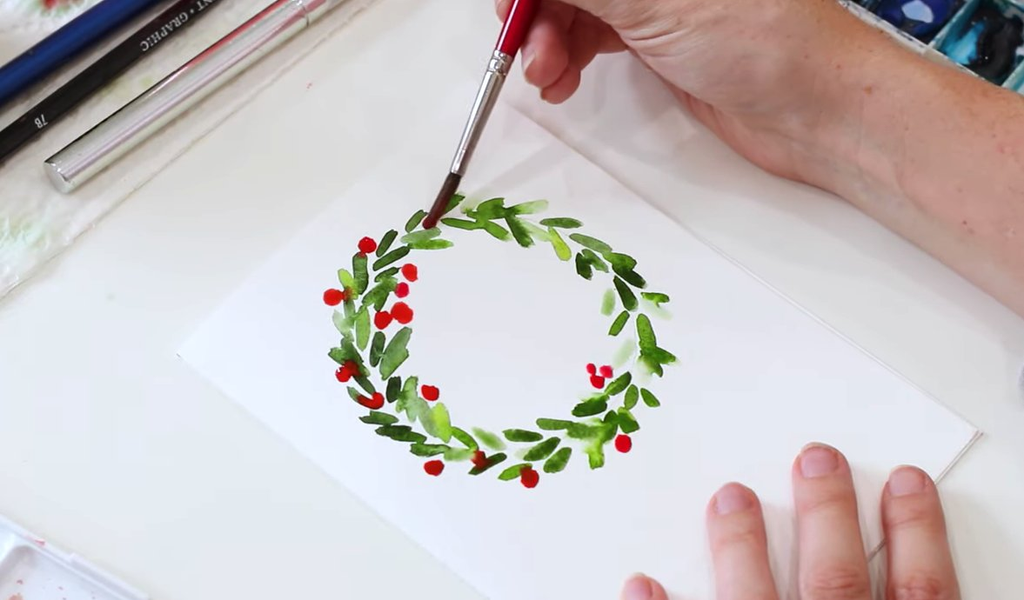
- Add fine details like berries, pine needles, or lettering using a small round brush once the base colors are dry to the touch. Don’t worry about making every detail perfect, as the natural texture of the wreath will add character to your hand-painted elements.
- Seal the final design with a clear acrylic spray sealer once the paint has cured for at least 24 hours. This step is essential for outdoor pieces because it protects the pigment from moisture and prevents the colors from fading under direct sunlight during the winter months.
- Attach decorative accents like ribbons, bells, or ornaments using hot glue or floral wire after the sealer has fully dried. Make sure you test the weight of your additions to ensure the wreath remains balanced and won’t tilt when it’s hung on a vertical surface.
Tip: Start with half the amount of paint you think you need on your brush and add more only when you can see the coverage isn’t enough; this keeps the finish clean.
5 Best Spray Paint for Artificial Christmas Trees Tested in 2026
How Long Does It Take and How Much Does It Cost?
The time and cost vary based on the size of the wreath and the quality of the materials you choose to use. The following table provides a breakdown to help you plan your project effectively.
| Wreath Size | Estimated Time | Estimated Cost |
|---|---|---|
| Small (12 inch) | 1.5 – 2 hours | $10 – $20 |
| Medium (18 inch) | 2 – 3 hours | $15 – $30 |
| Large (24+ inch) | 3 – 5 hours | $25 – $50 |
Essential Supplies for Success
To get the best results, you need the right tools that match your specific wreath material. Acrylic paints are the standard choice for this project, as they dry quickly and are easy to clean up with water. You should always use paints marked as “outdoor” or “weather-resistant” if your wreath will spend any time exposed to the elements.
- Acrylic craft paint: Choose high-pigment colors that offer good coverage on dark backgrounds.
- Brushes: A set containing flat, filbert, and fine-point brushes allows you to switch between large areas and tiny details.
- Sealer: Clear coat sprays come in matte, satin, or gloss finishes; matte is often best for a natural look.
- Floral wire: This is more durable than glue for securing heavier items like large ribbons or wood cutouts.
- Painter’s tape: Use this to mask off areas you want to keep blank or to create crisp lines for geometric patterns.
Why Your Paint Might Not Be Sticking
If you find that your paint is peeling or looks patchy, it’s usually because of the surface texture or leftover debris. Natural wreaths often have oils or sap that can block paint, while artificial plastic wreaths have a smooth, slick surface that paint struggles to grip without help.
Why does the paint bead up on my artificial wreath?
Artificial wreaths are often made from plastic or PVC that has a factory-applied finish. You can fix this by lightly sanding the surface with fine-grit sandpaper to give the paint something to hold onto, or by using a spray-on plastic primer before you start your main color application.
Why is my paint cracking after it dries?
Cracking usually happens when you apply paint too thickly or if you paint on a surface that’s too flexible. Always use thin coats and let each one dry completely before adding the next; if you’re painting on a very bendy vine, try to keep the paint layers light so they don’t stiffen the material too much.
Why does my wreath look dull after a few weeks outside?
Even high-quality paints will lose their vibrancy when exposed to constant UV rays and moisture. You can prevent this by using a high-quality UV-resistant clear coat, as recommended by the Environmental Protection Agency regarding the use of protective coatings and finishes. A good sealer adds a barrier that keeps the color locked in and prevents the base material from absorbing water.
Is It Safe to Do This Yourself?
Painting a wreath is a safe and common DIY project, provided you follow basic safety guidelines while working with paints and sprays. Always work in a well-ventilated area, such as a garage with the door open or a sheltered patio, to avoid breathing in fumes from aerosol sealers or spray primers.
If you’re working with children, make sure they use non-toxic, water-based paints that don’t require heavy solvents for cleanup. Keep all tools like hot glue guns on a stable surface where they won’t tip over, and always unplug your glue gun immediately after you finish your work to prevent fire hazards. You don’t need to be an artist to get a great result; the charm of a handmade wreath comes from the natural imperfections and your personal color choices.
Frequently Asked Questions
Can I paint a fresh evergreen wreath?
It isn’t recommended to paint a fresh, living wreath because the needles will naturally shed and dry out within a few weeks. The paint will also trap moisture against the needles, which can cause the greenery to rot or mold much faster than it would if left in its natural state.
How do I prevent paint from dripping into the center?
You can prevent drips by holding the wreath flat on a table while you paint, rather than hanging it up vertically. If you must paint it while it’s upright, use very light, mist-like coats of paint and work from the top down, catching any potential runs with a paper towel before they set.
What is the best way to clean my wreath after a season?
You can gently blow off dust with a hair dryer on a cool, low-speed setting or use a soft-bristled brush to sweep away cobwebs. Avoid using water or liquid cleaners, as these can soften the paint or cause the underlying wreath base to expand and lose its shape.
Can I use spray paint instead of acrylic brushes?
Yes, spray paint is an excellent way to cover a large wreath base quickly and evenly. It’s particularly effective for getting into the deep crevices of a thick pine or grapevine wreath where a brush might not reach, though you should always move the can constantly to avoid thick spots.
How do I fix a mistake I made while painting?
If you make a mistake while the paint is still wet, wipe it away immediately with a damp paper towel. If the paint has already dried, the easiest solution is to wait until it’s fully cured and then paint a new layer of your base color over the area to cover the error completely.
Is a matte or glossy sealer better for outdoor use?
A matte sealer is preferred for holiday wreaths because it provides a natural look without reflecting glare. Glossy sealers can appear plastic, though they offer slightly more water protection. Choose the finish that best matches your design goal.
Why does my paint feel sticky even after it has dried?
Sticky paint usually occurs because the environment is too humid or the paint was applied too thickly. Move the wreath to a warm, dry room for 24 hours to finish curing. If tackiness persists, apply a very light dusting of cornstarch with a soft brush.
What should I do if the paint peels when I remove the painter’s tape?
Peeling happens when paint bonds to tape more strongly than the wreath, or when tape is removed too late. Pull the tape away at a 45-degree angle while the final coat is still slightly damp. If edges peel, touch up gaps with a tiny brush.
How do I paint metallic accents without them looking cheap?
Metallic paints look best when used for highlighting rather than full coverage. Use a dry-brushing technique to drag paint over raised edges, which adds depth and a realistic shimmer. Avoid applying metallic paint as a solid block of color to prevent a flat appearance.
Can I paint a wreath that has already been decorated with fabric?
Painting fabric-wrapped wreaths requires a primer or gesso base to seal the fibers and prevent blotchiness. Fabric absorbs more paint than other bases, so you may need multiple coats to achieve full coverage. Plan for extra drying time between each application to ensure the color remains vibrant.
| Material Type | Paint Adhesion Quality | Recommended Primer |
|---|---|---|
| Plastic/Artificial | Low | Plastic-specific spray primer |
| Grapevine/Wood | High | Standard acrylic gesso |
| Burlap/Fabric | Medium | Heavy-duty fabric gesso |
| Metal Frames | Low | Rust-inhibiting metal primer |
How do I keep the paint from clogging the small crevices of a pine wreath?
Clogging occurs when brushes push excess paint into needles, creating blobs. Instead, use a spray bottle with thinned paint or a foam sponge to dab the surface. This ensures an even coat that keeps the wreath looking light and natural rather than heavy and clumped.
Why do my colors look different once they’re dry?
Acrylic paints often dry to a darker or more muted shade than they appear when wet. Always test your colors on a scrap piece of the same material and let them dry for an hour. This prevents the need to repaint the entire project if the shade is wrong.
Can I fix a wreath that I accidentally painted too heavily?
If you apply too much paint, use a stiff, dry brush to gently scrub away the excess while it’s still wet. If the paint has already dried, it’s difficult to remove without damaging the texture. You may need to add decorative elements to hide the pooled areas.
Is it safe to paint a wreath that will be near a heating vent?
Avoid placing a painted wreath near a heating vent, as the hot, dry air can cause paint to crack. Heat can also soften the glue used for decorations, causing them to fall off. If your door is near a vent, redirect the airflow to keep the wreath stable.
How do I store a painted wreath to prevent the paint from sticking?
Store your wreath wrapped in acid-free tissue paper or a cotton sheet to prevent moisture buildup. Place it in a sturdy box in a cool, dry closet to avoid temperature fluctuations. Proper storage ensures your paint job remains vibrant and intact for many years of reuse.
Conclusion
Once your paint is fully dry, hang your creation on your front door to welcome guests throughout the holidays. You’ll love how the colors pop against the greenery. If you’ve got extra supplies left over, try painting a few matching pinecones to scatter on your mantel for a cozy, coordinated look.